Windframe Multipages Designs
Windframe offers a robust feature set that facilitates the creation of multi-page designs, enabling developers and designers to construct comprehensive websites efficiently.
Designing Multiple Pages on Windframe
One of the standout features of Windframe is its capability to create multiple pages within a web design project. This functionality allows users to either separate or group related designs and content across different pages, giving them the flexibility to organize their projects in a way that best suits their needs. Whether you are working on a complex website with distinct pages or a single-page layout that requires segmented content, this feature ensures that your designs remain structured and consistant throughout the entire project. Follow these steps to design multiple pages within your Windframe project effectively:
Step 1: Open the Windframe Editor
- Log in to your Windframe account.
- Navigate to the windframe editor.
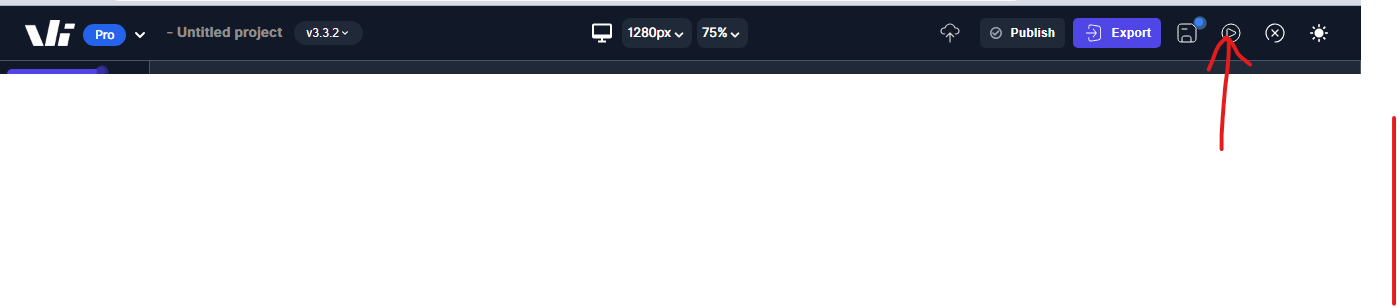
Step 2: Access the tool bar on the top of the interface
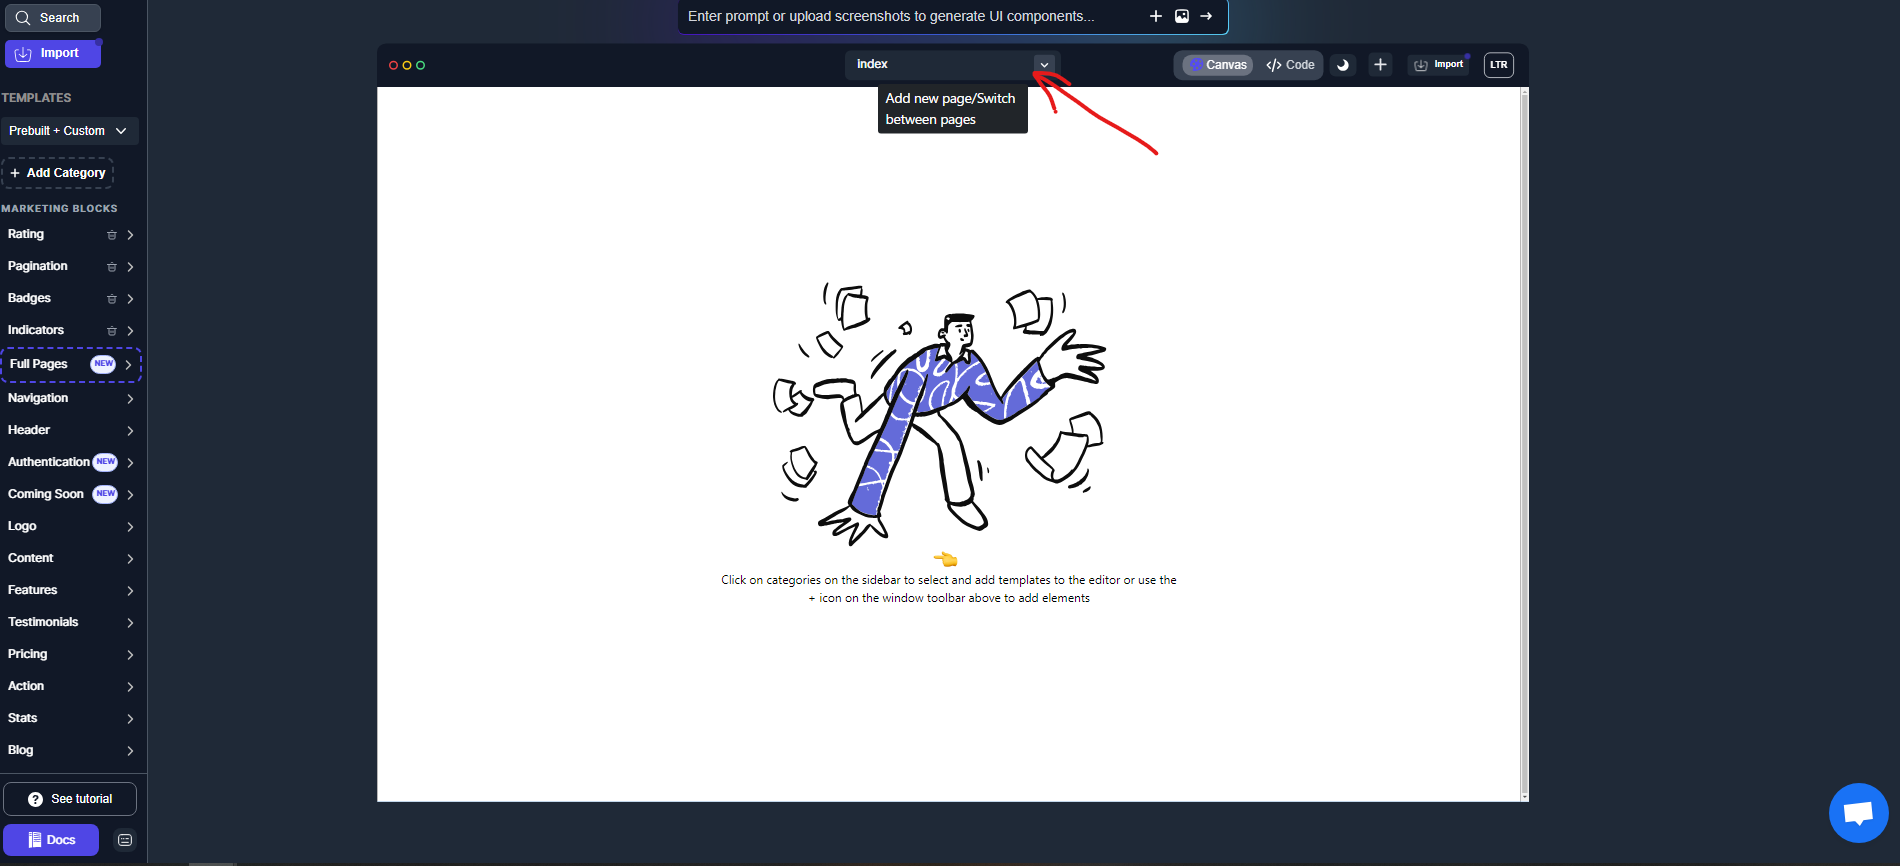
- On the windframe interface on the tool bar
- Click on the dropdown button, labelled with the default selected page "index", in the canvas toolbar.
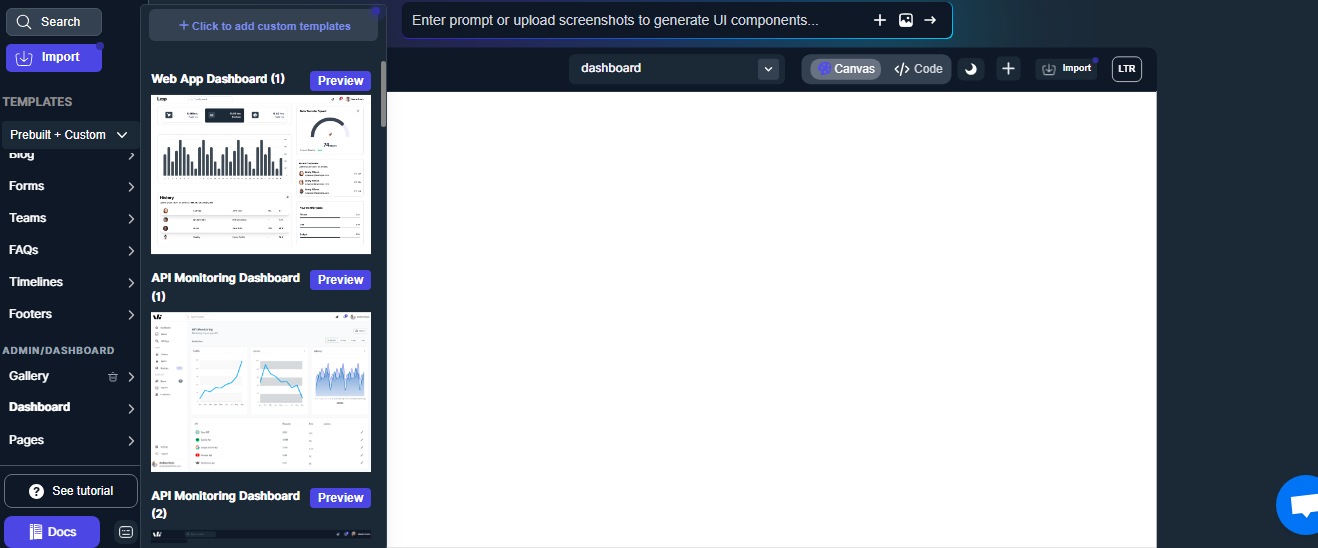
Step 3: Create a new Page
- On the top dropdown click on the "Add Page +" button.
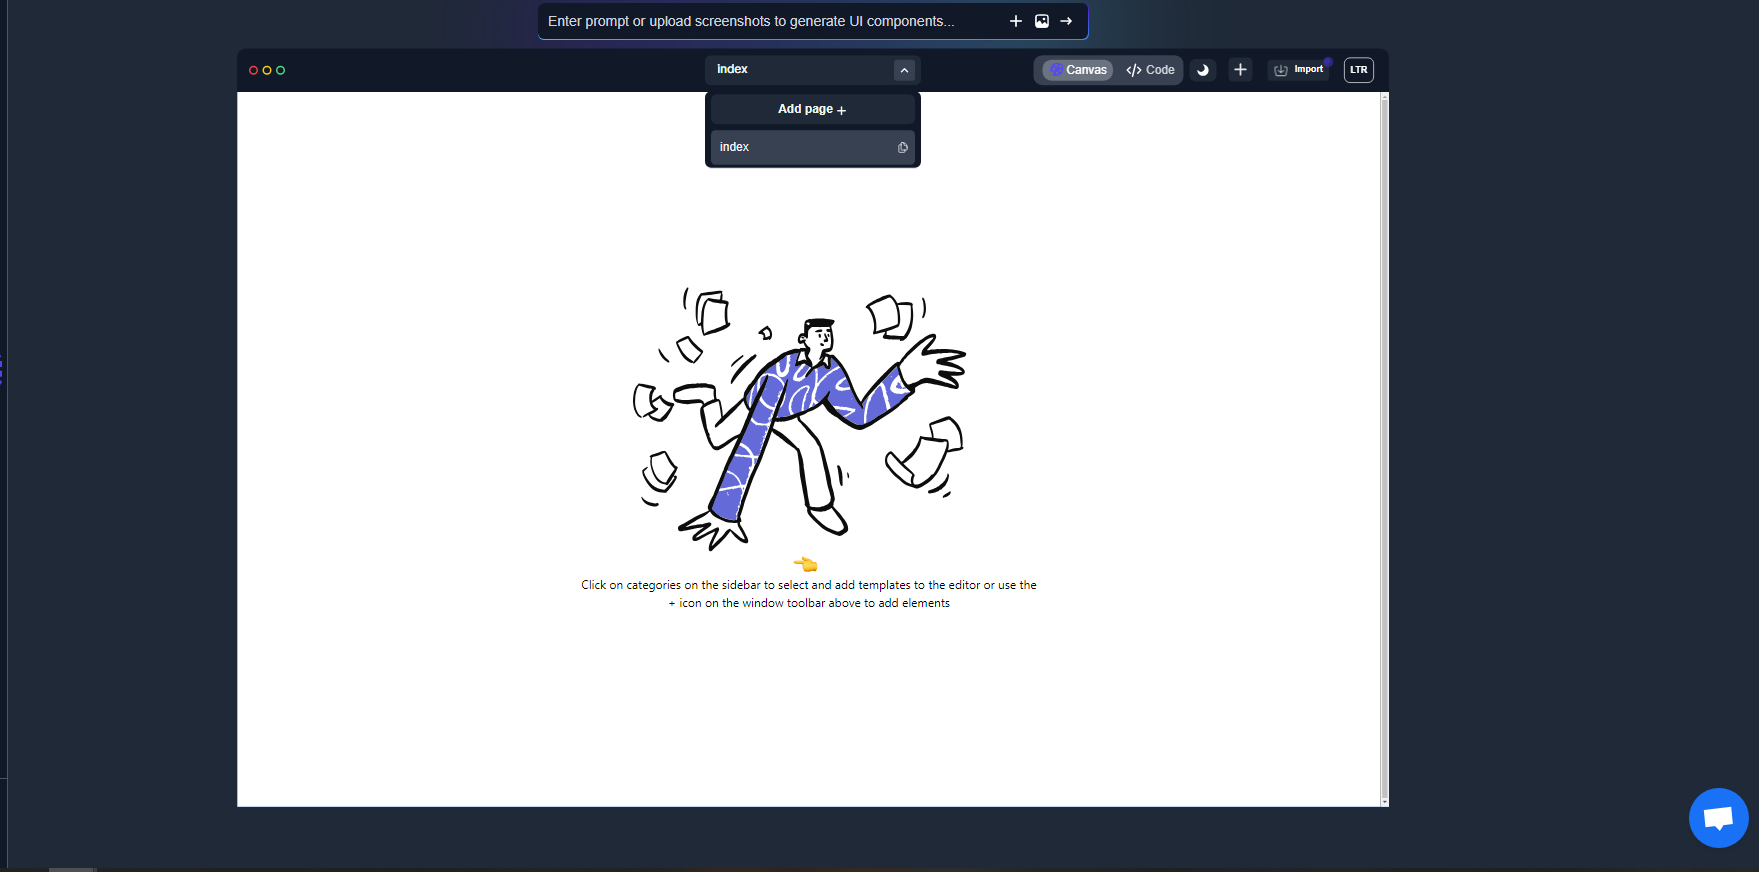
- Provide a name for your new page.
Step 4: Design Your new pages
- Once the new page is created, it will open in the editor.
- Use the available blocks and components to design your page. Drag and drop elements, customize styles, and add content as needed.
- Save your changes regularly to ensure your work is not lost.
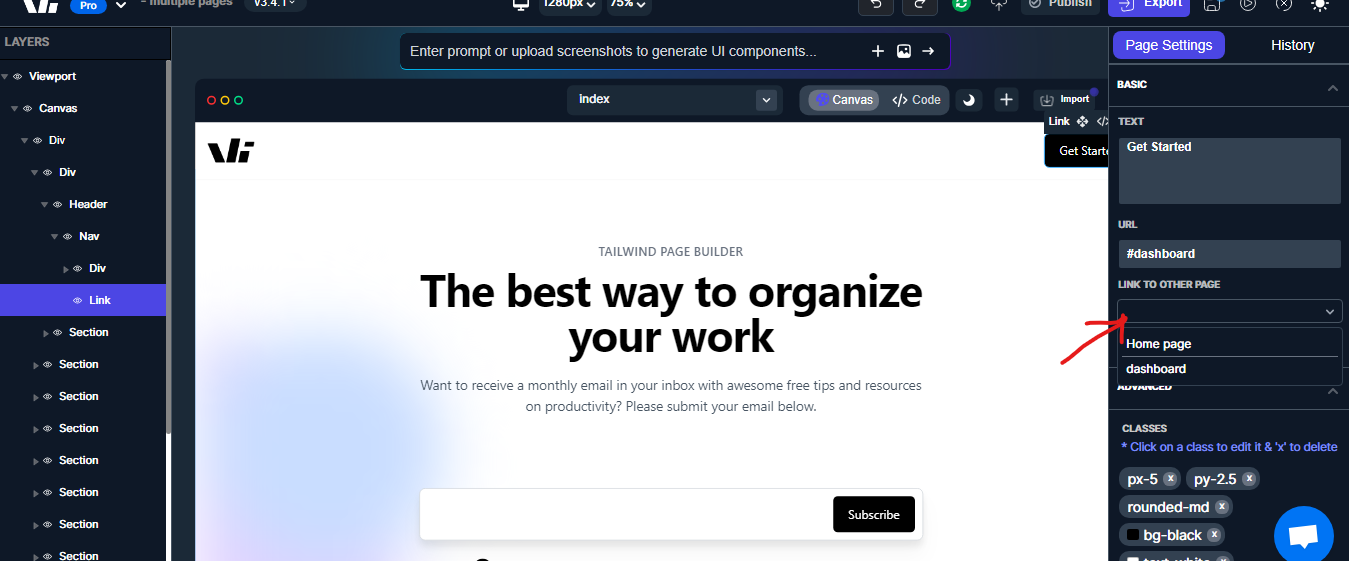
Step 5: Linking Pages Together
- Click on the item you wish to insert a link and an edit bar will show on the right sidebar

- Then click on the "link to other pages" option to select the page you want to link to
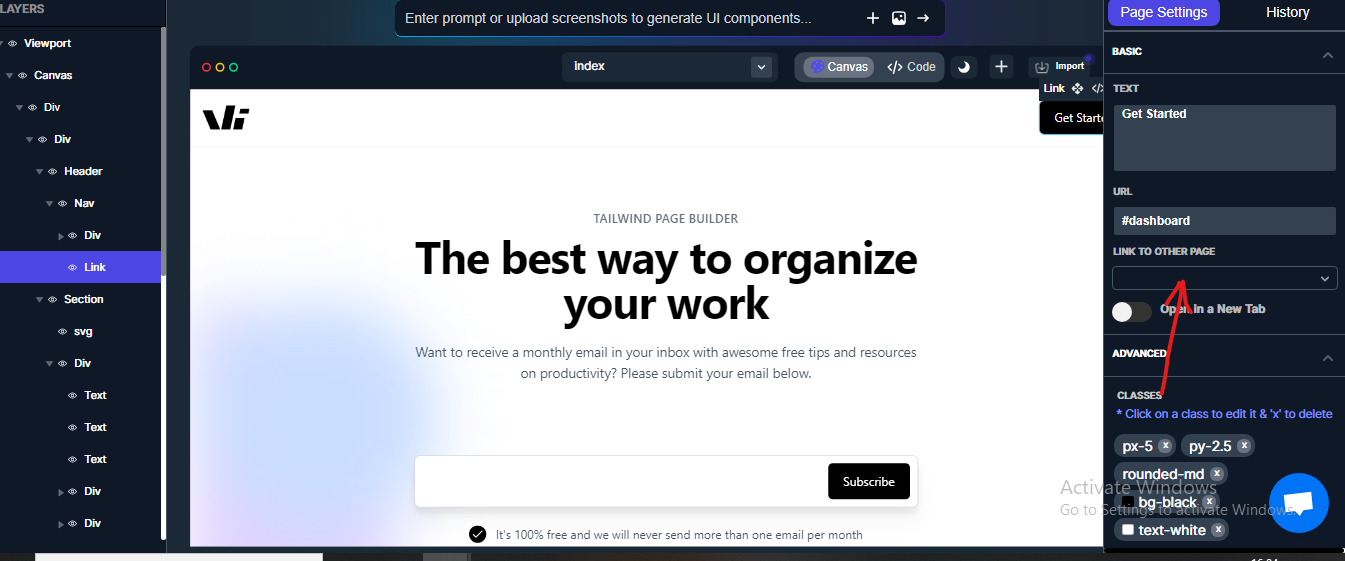
- Go ahead and select the page you wish to link to the item from the dropdown of the pages that you have created.
-
You can also choose to select whether you want this linked pages to open in another tab or not by clicking the "open in new tab" button below "link to other pages" options.
-
Repeat this for the other pages
-
Ensure that each item points to the correct page by selecting the appropriate page from the link options.
🔹 Note: Linking to a subpage is a subheading of its own in Windframe. You can do this by selecting the desired page from the dropdown of available pages when setting a link — no manual input required.
Step 6: Preview and test your pages
- Use the "Preview" button in the Windframe editor to see how your pages will look and function.
-
Navigate through your pages using the links you created to ensure everything is working correctly.
-
Make any necessary adjustments to improve the user experience and design consistency.
Step 7: Publish Your Project
- Once you are satisfied with your pages, click on the "Publish" button in the top toolbar of Windframe editor.
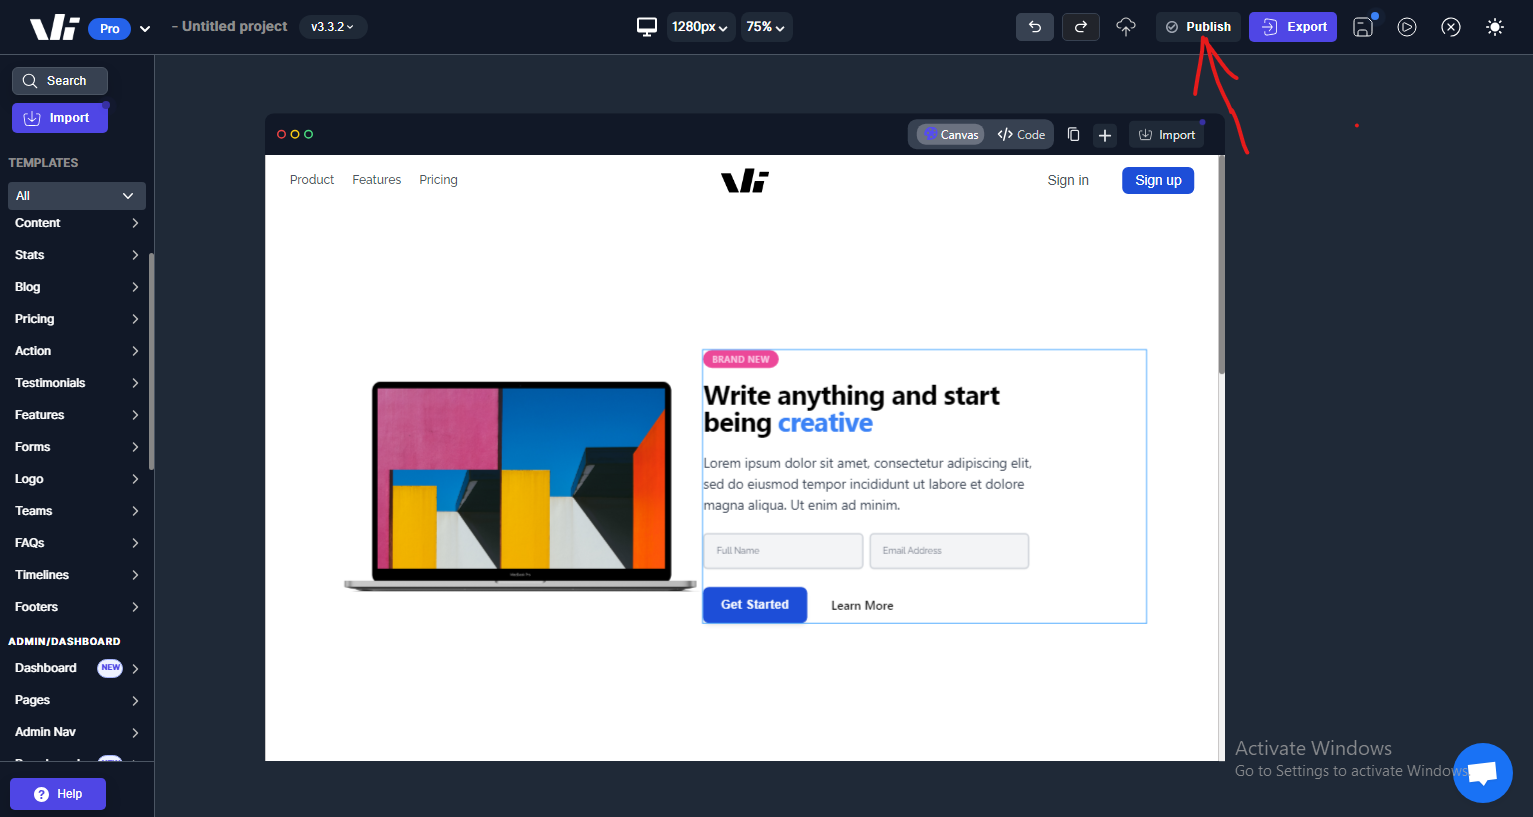
- Follow the prompts to publish your project and make it live on the web.
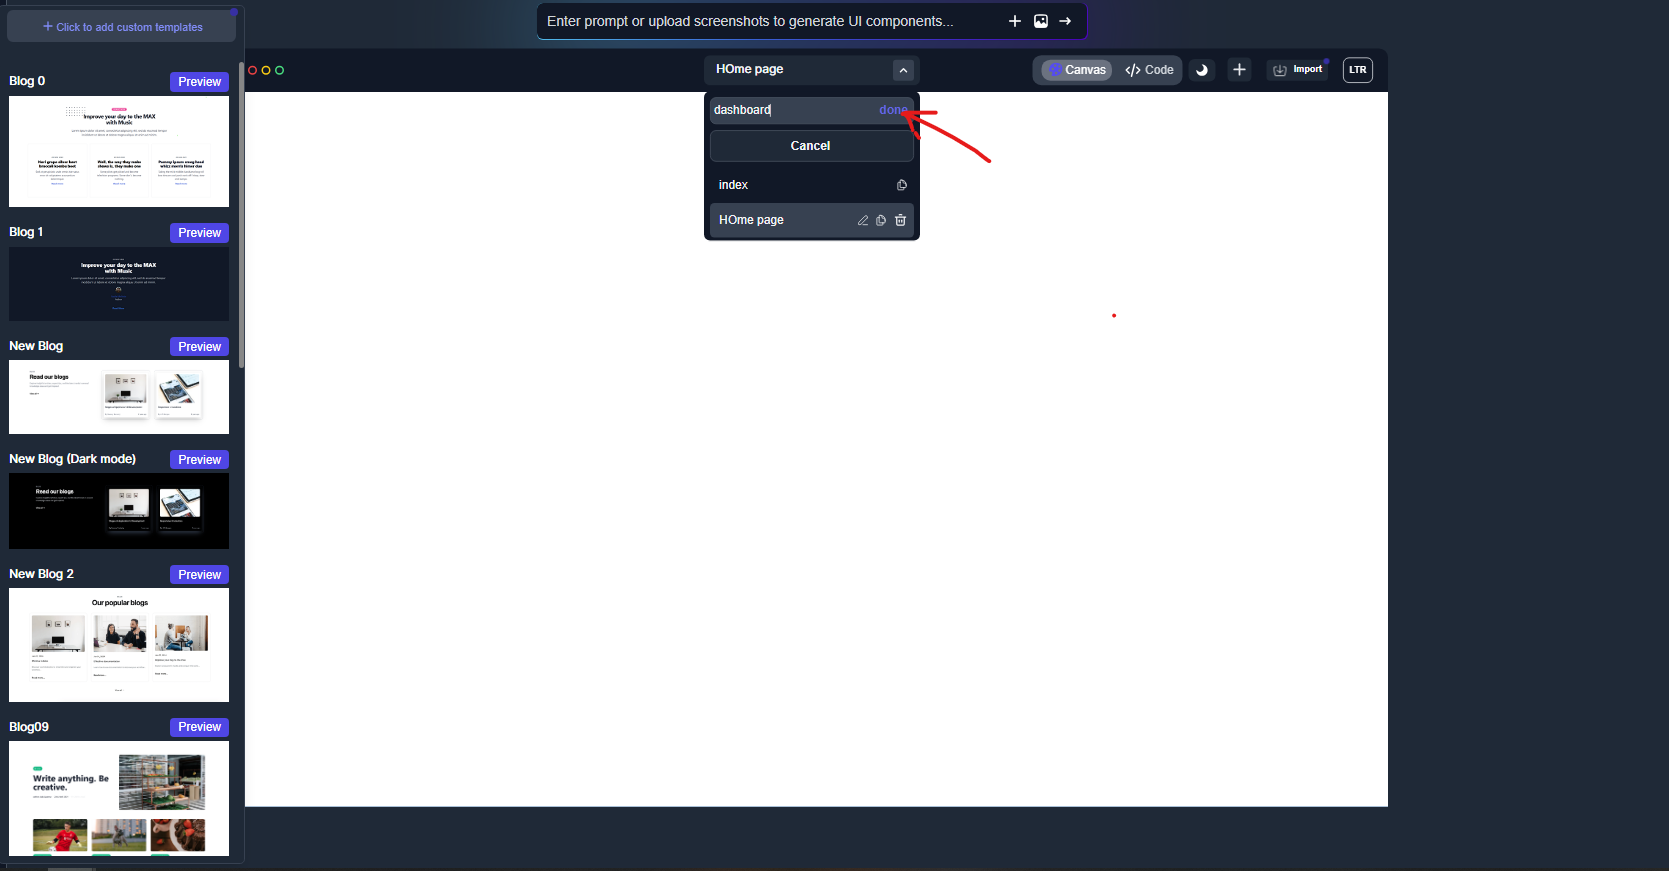
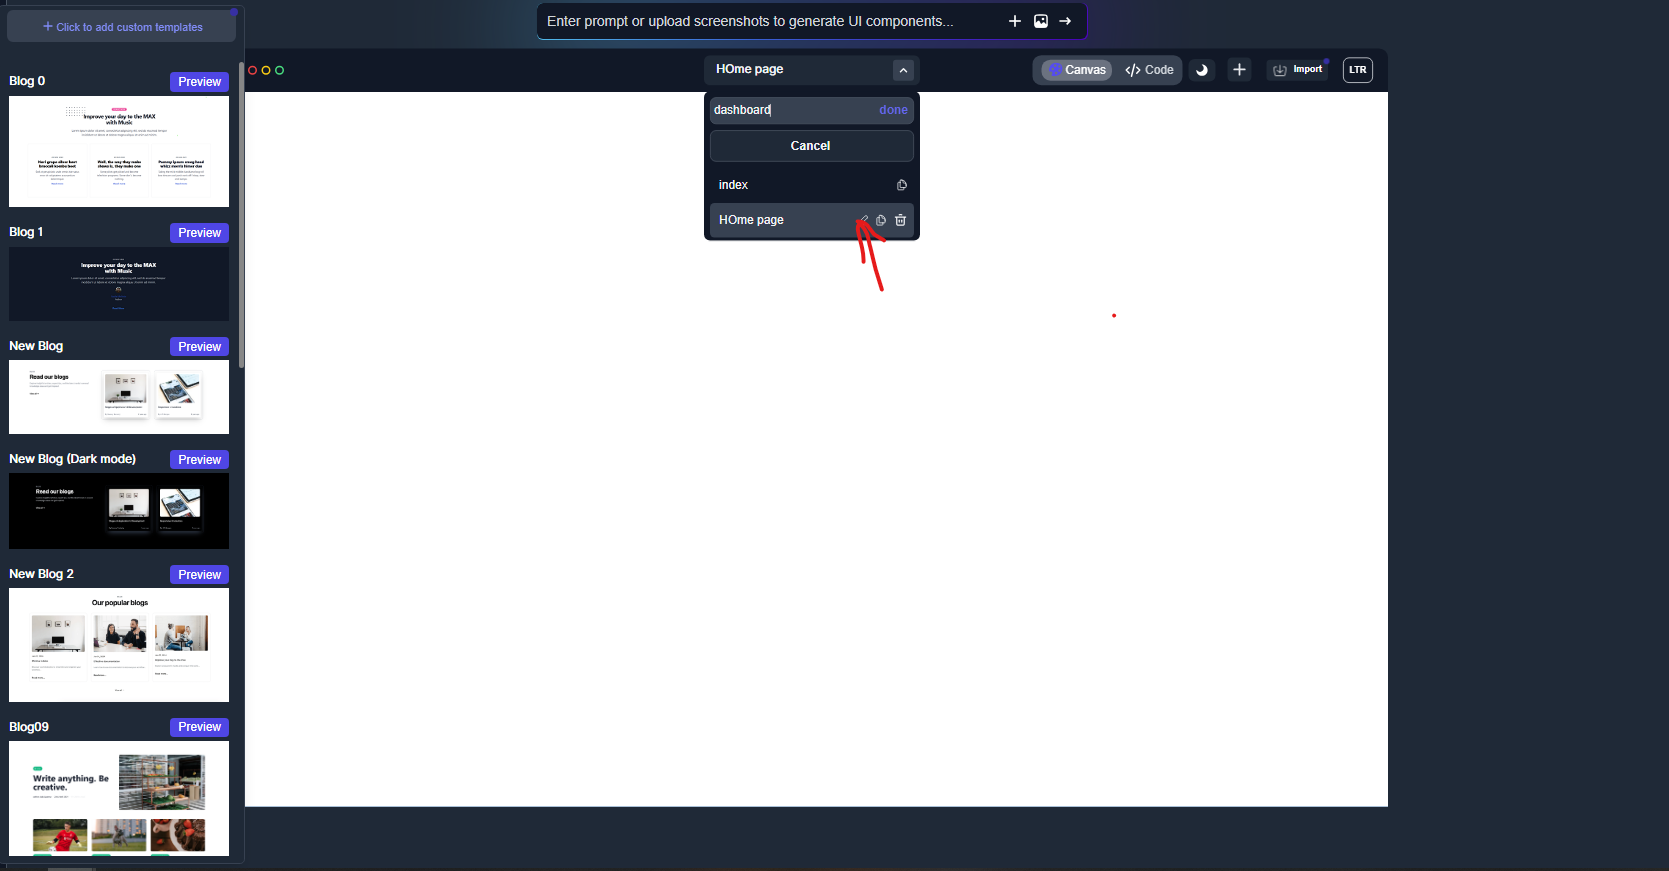
Renaming the pages
Windframe also allows you to rename the different pages you have created within the project separately.
Step 1: Rename the page on the dropdown
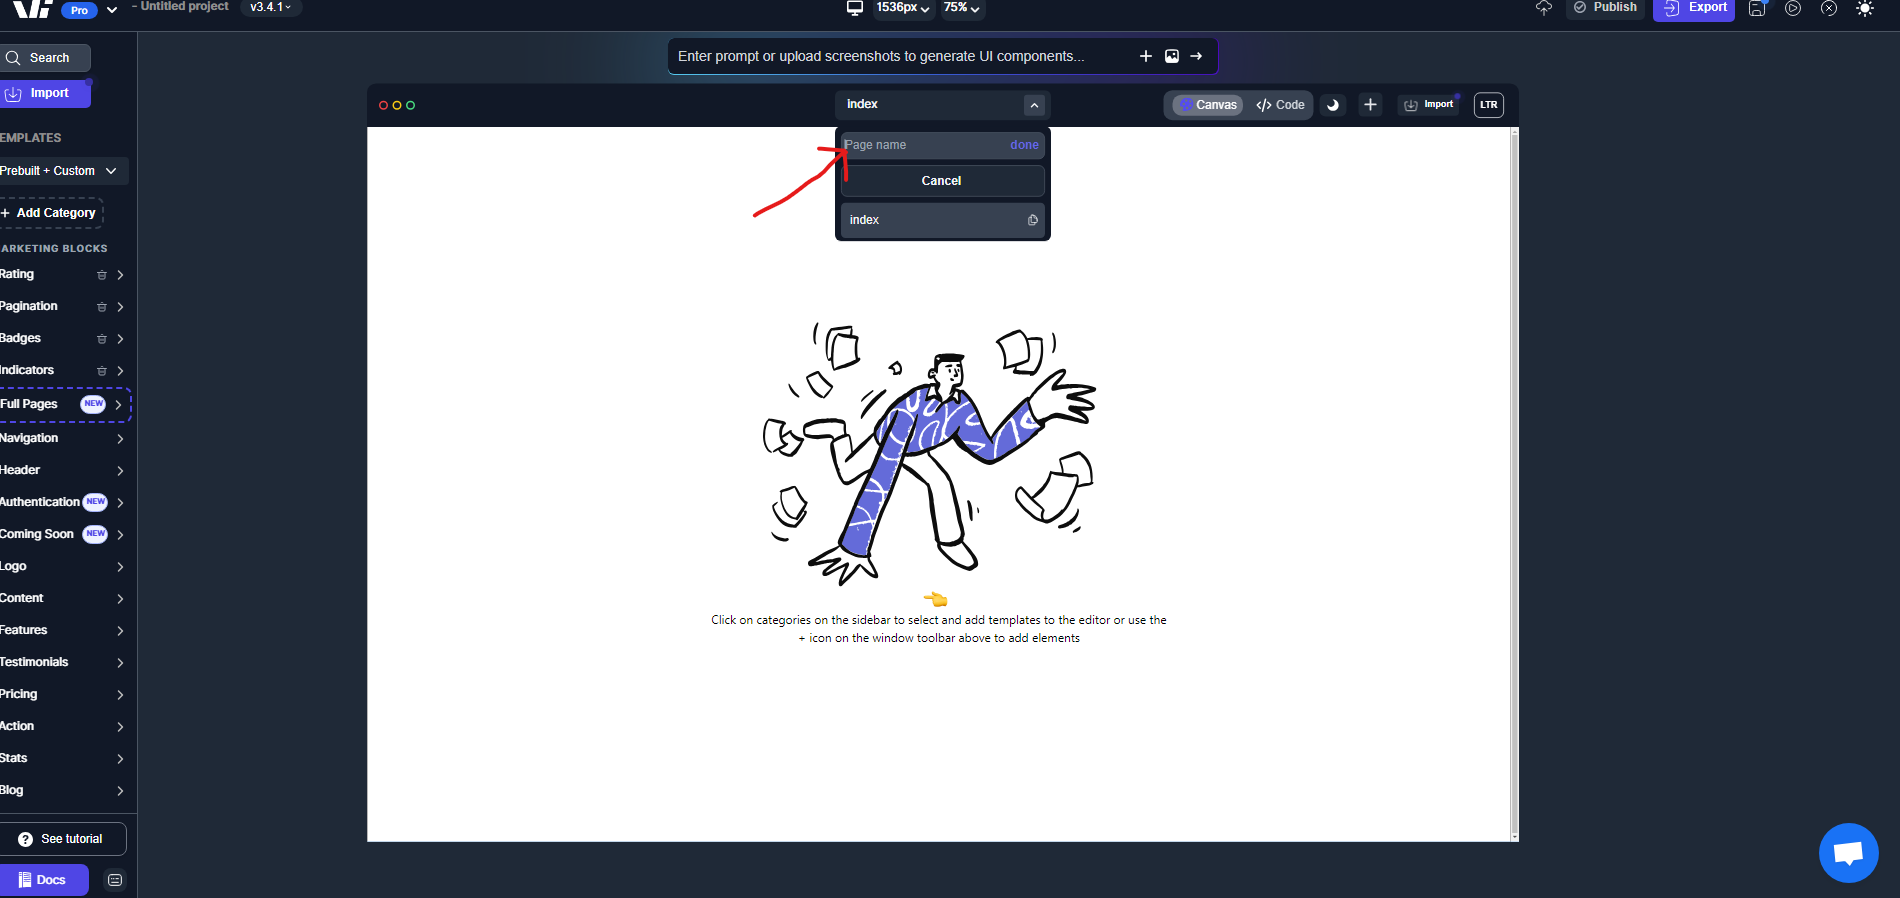
- click on the page dropdown located at the canvas toolbar
- Go to the page you wish to rename and click on the rename button beside the page name.
Copying the pages
The Pages you created on windframe can also be copied.
Step 1: Copy the Page from the dropdown
- Go to the page you want to copy and click the copy button beside the page in the Page downdrop.

Deleting the pages
The pages you created can also be deleted if you no longer wish to include the page to your project
Step 1: Delete the page from the dropdown
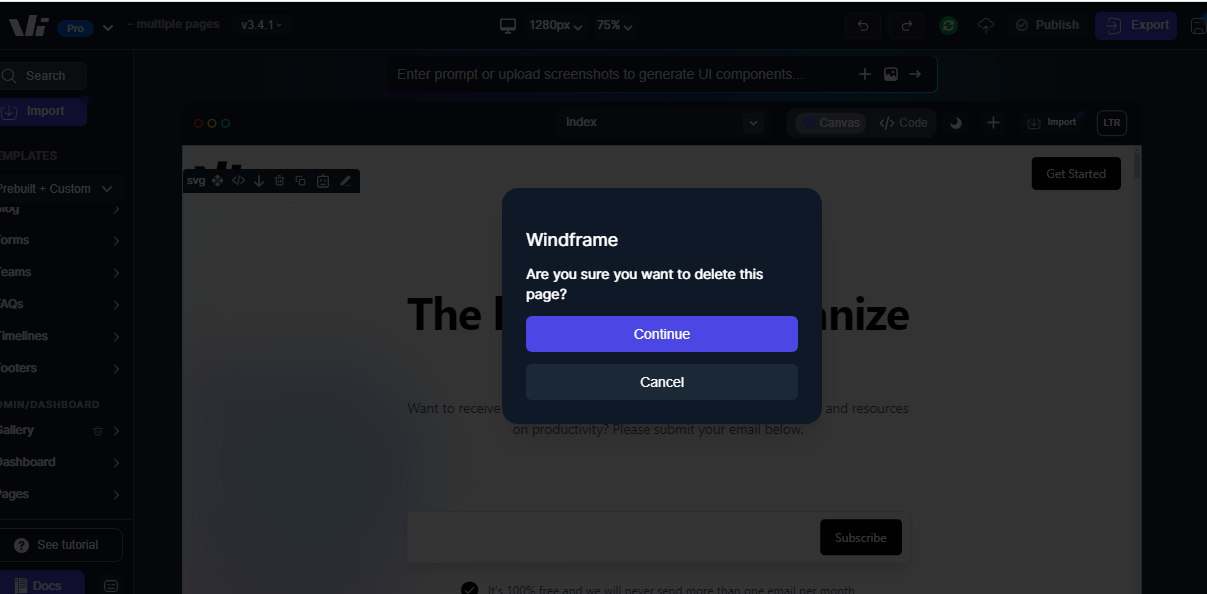
- To do this you simply go the the page on the page bar and click the delete button beside the page you wish to delete
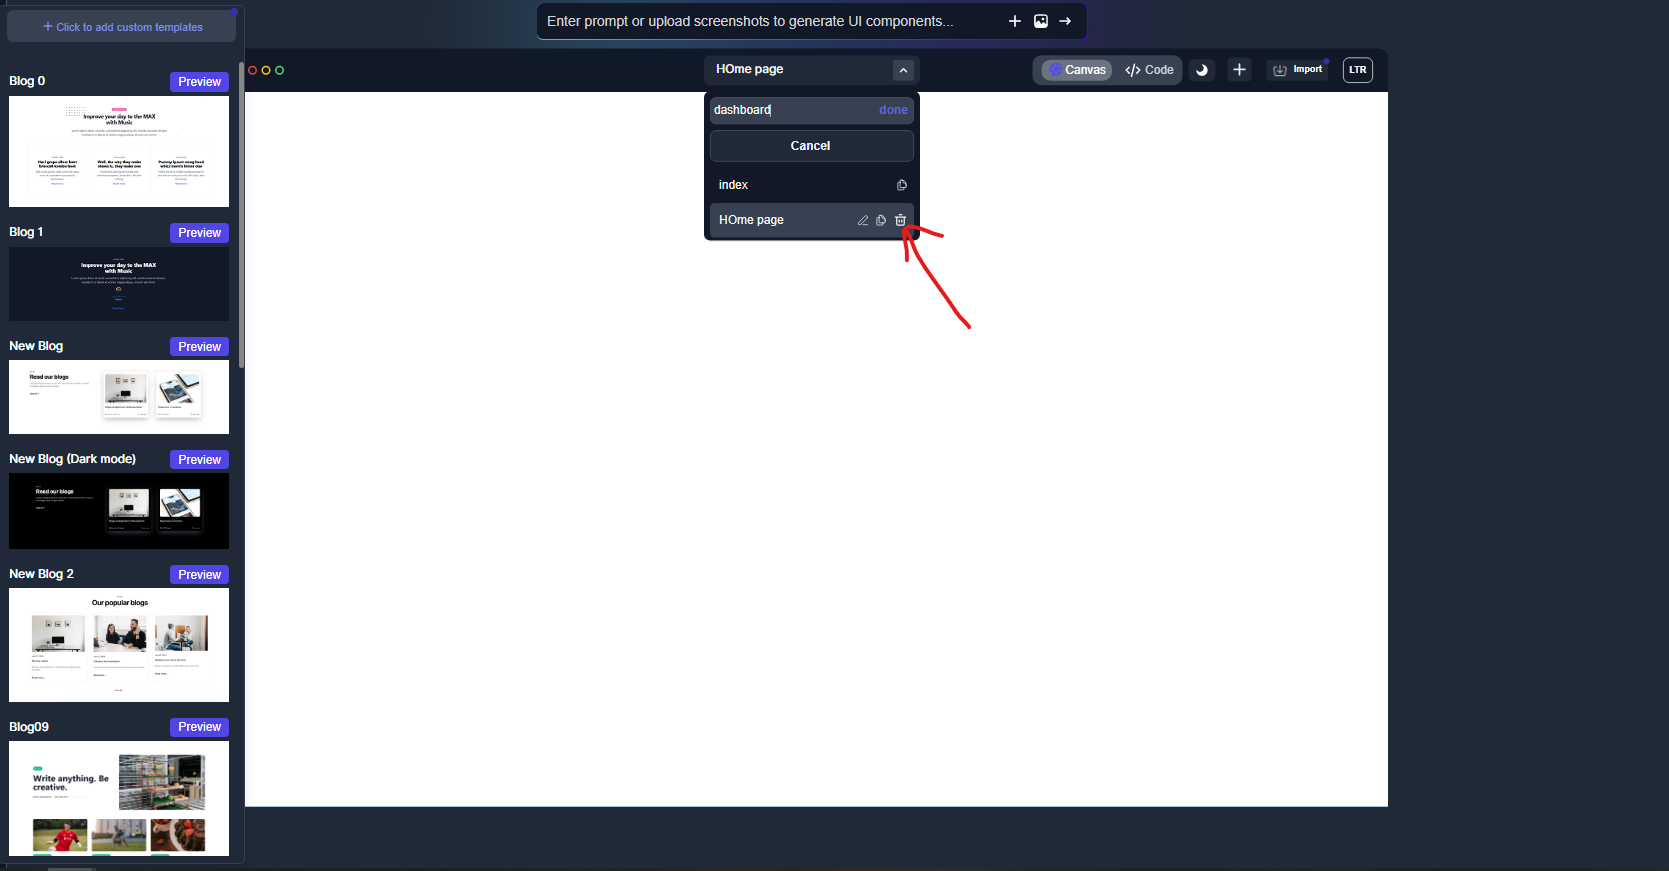
- Confirm that you wish to delete the page by clicking on the "Continue" button on the popup.