🚀 Just launchedApple UI design taste for AI agents — create polished UIs using Apple’s design style.Try it now
Creating New Project in Windframe
Creating a new project in Windframe is a straightforward process that can be accomplished through two primary methods: directly within the editor or via your account dashboard.
In Windframe, you have two methods for creating projects: you can either create them from the accounts page or opt for a more direct approach right from within the editor. This flexibility ensures that you can easily start your projects in a way that best suits your workflow and preferences.
Creating a New Project from the Editor
Follow these steps to create a new project from your Windframe Editor:
- Log in to your Windframe account and access the Windframe editor.
- To create a new project, click the menu at the top left of the canvas.
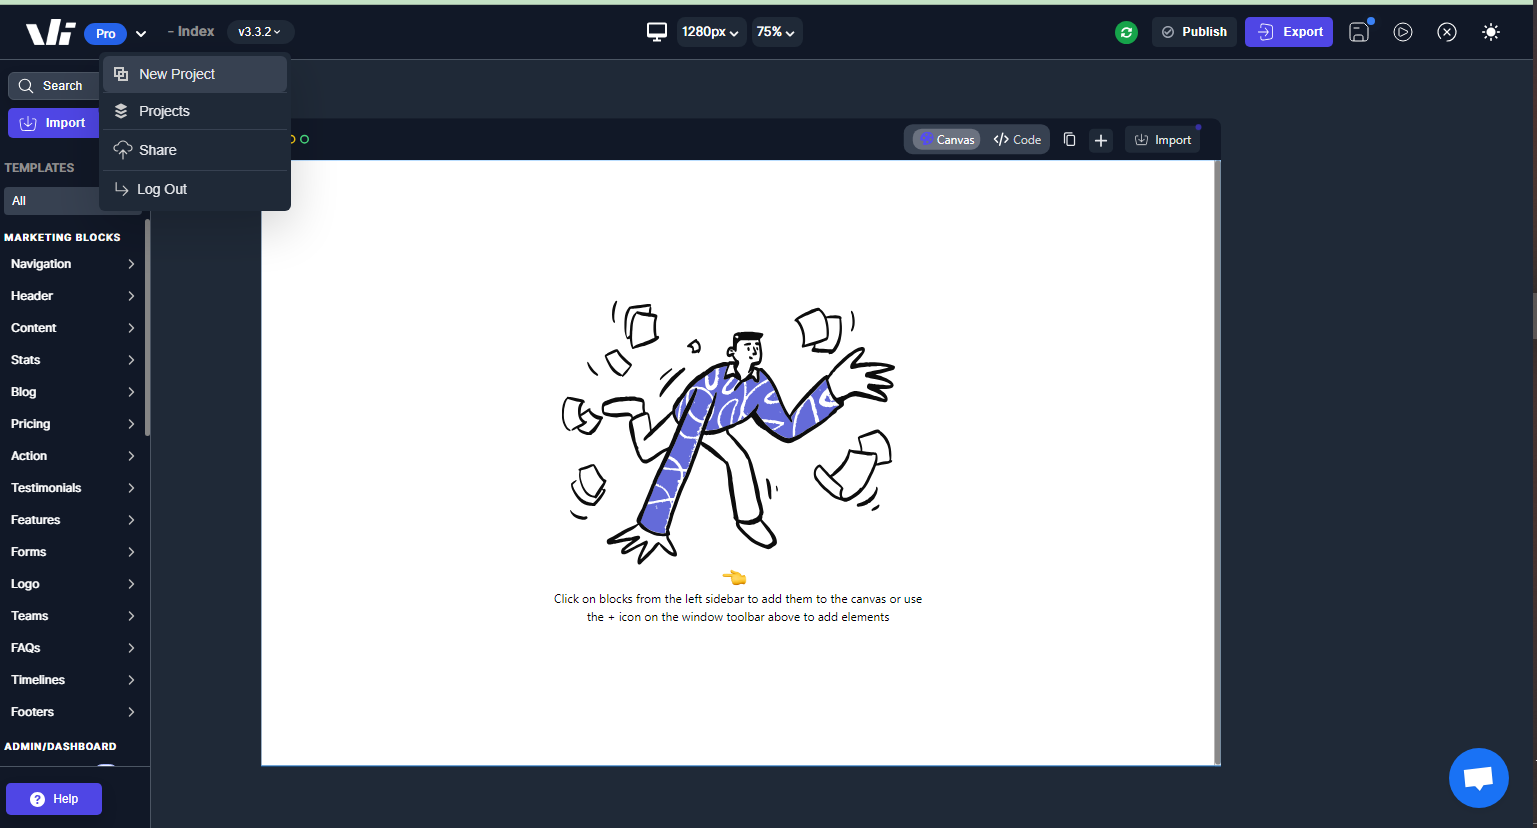
- Select "New Project" from the dropdown menu.
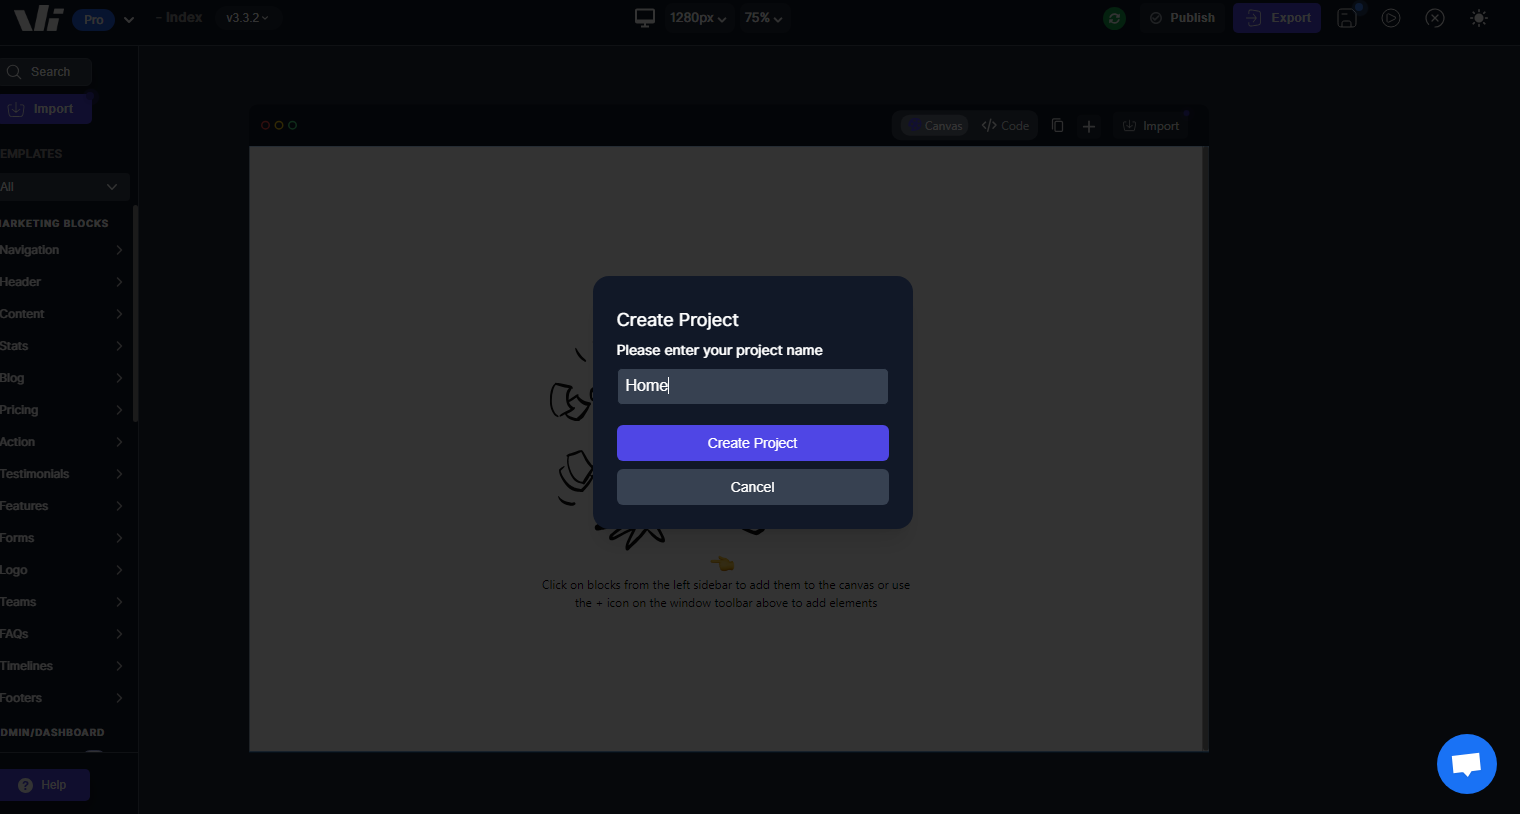
- Provide a name for your project and click "Create Project".
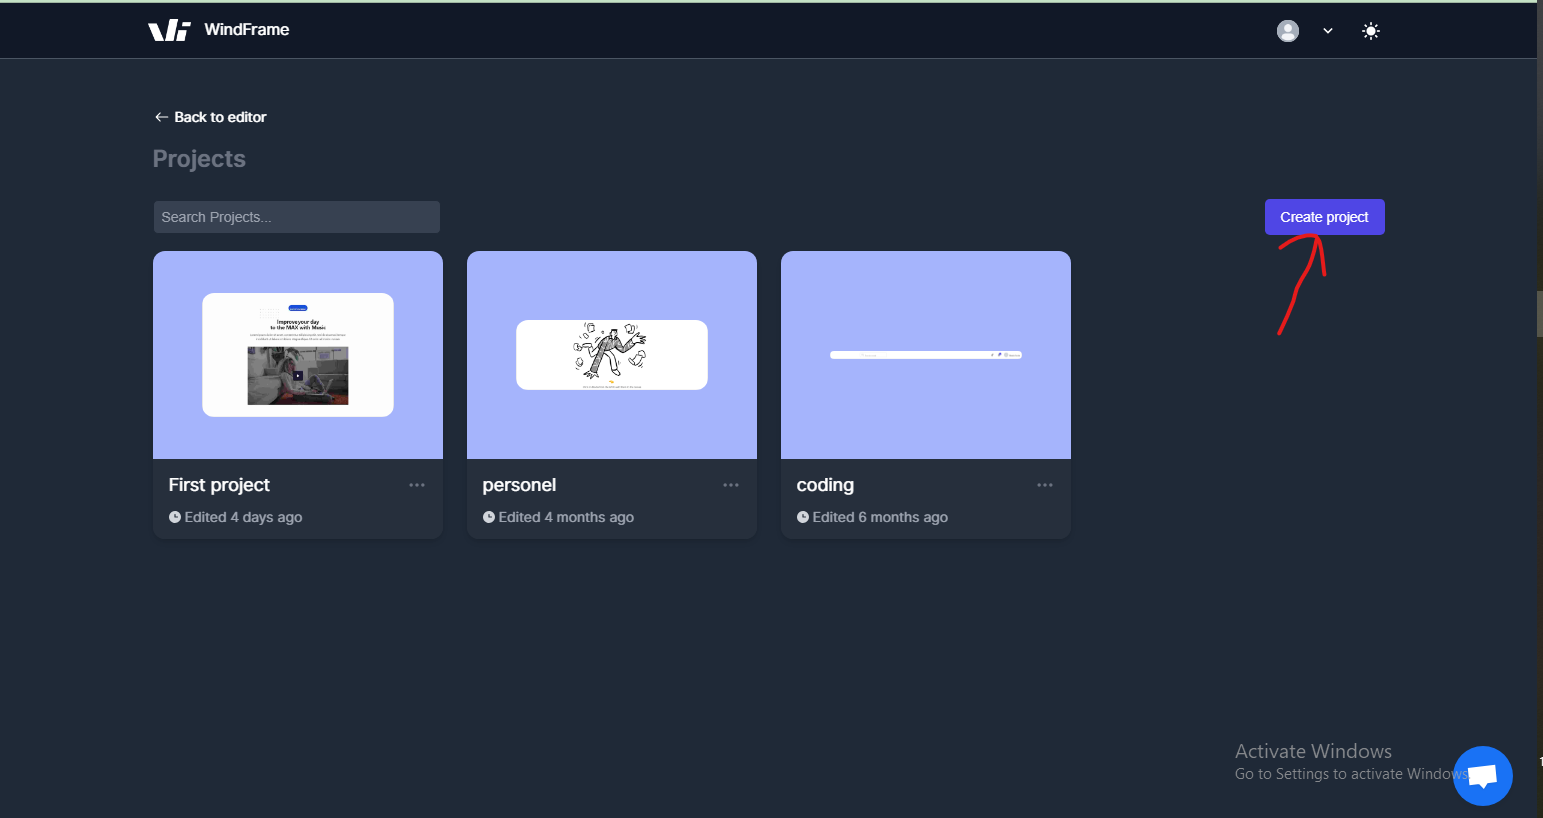
Creating a New Project from your Account Dashboard
Alternatively, you can start a new project directly from your Windframe account dashboard.
-
Log in to your Windframe account or sign up if you don't have one.
-
Once logged in, you'll access the Windframe dashboard.
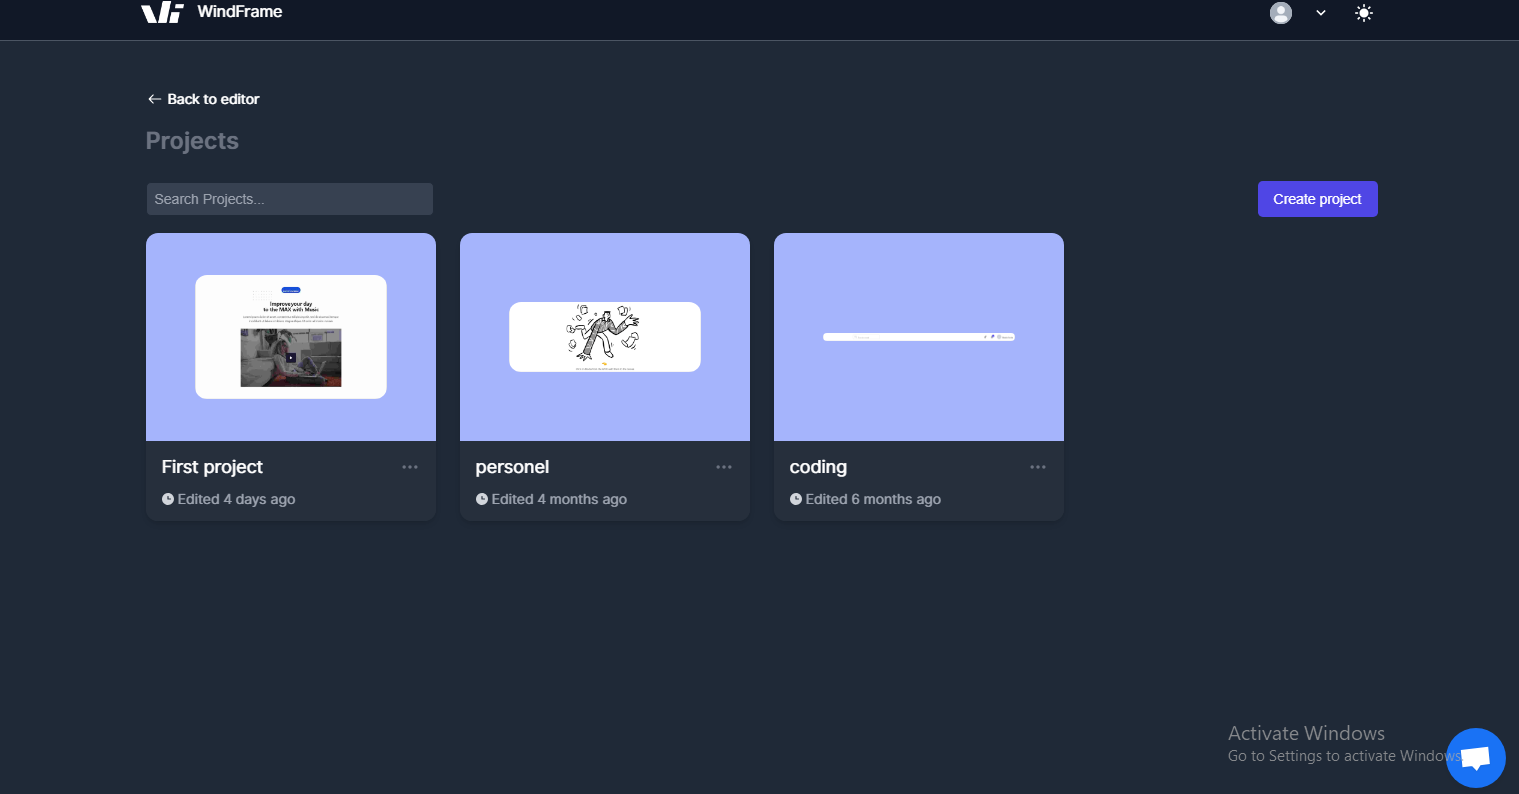
- Locate the "Create Project" button and click on it.
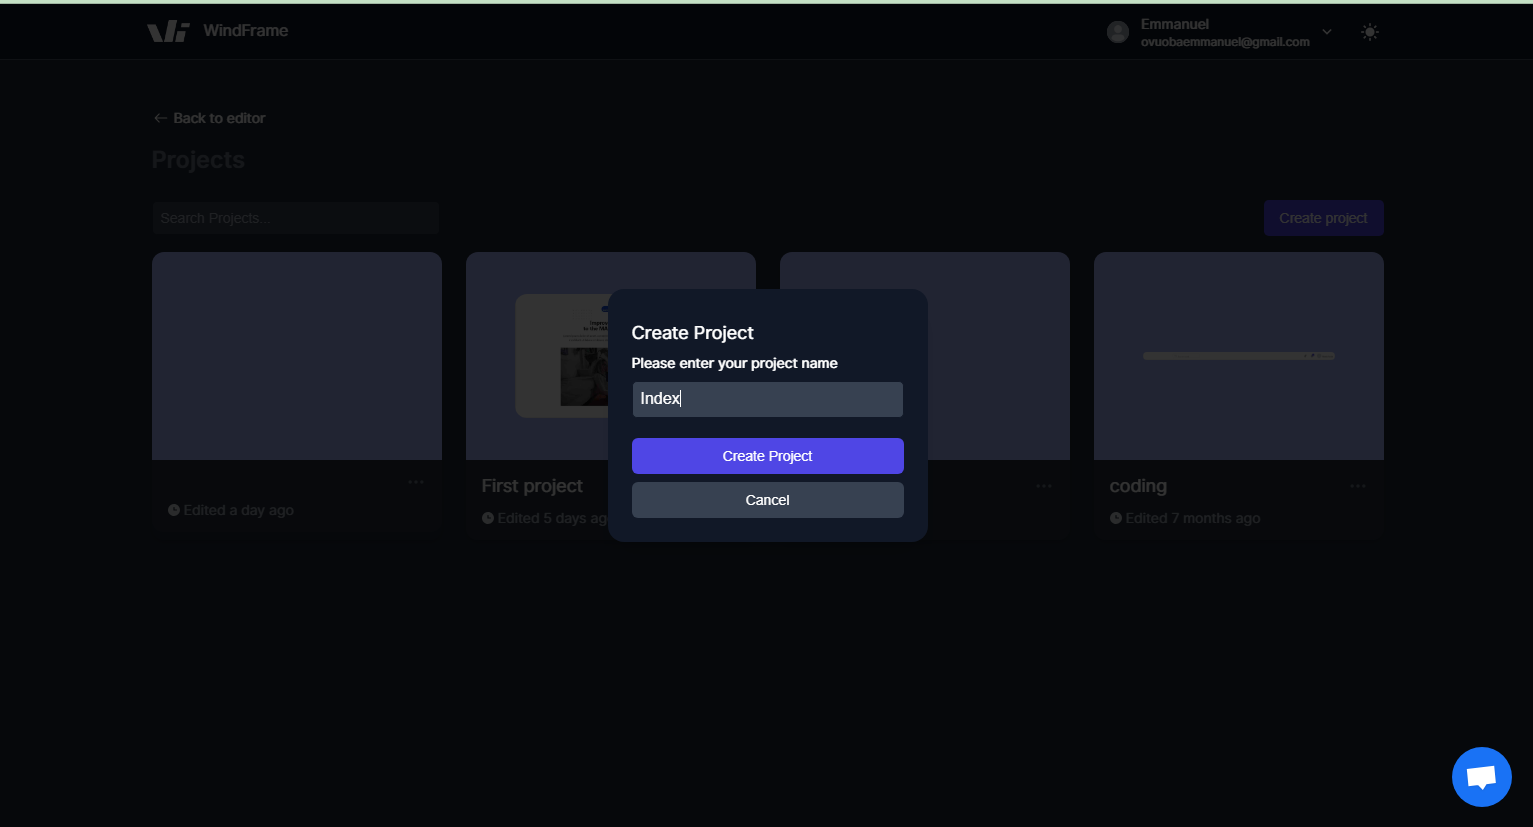
- You'll be prompted to provide a name for your project. Enter a descriptive name that helps you identify the project later.
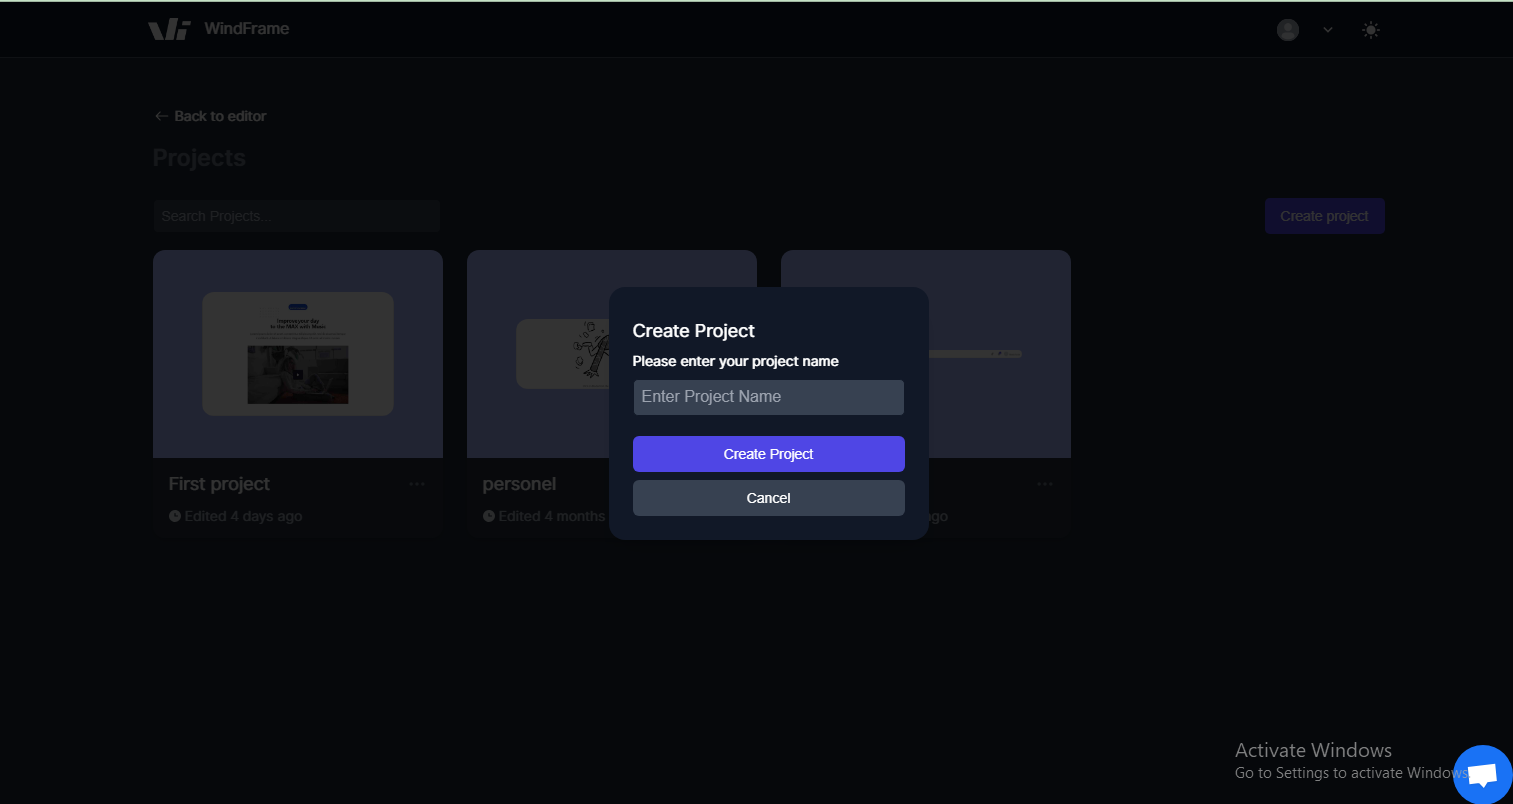
- Click the "Create Project" button to initialize your new project.
- Optionally, you may select a template or choose to start from scratch, depending on your project requirements.