AI Design Generation in Windframe
Step-by-step guide: write prompts, choose styles and colors, generate, refine with follow-up prompts, export AI designs, and add designs to canvas.
Use this page as a practical walkthrough for generating and refining designs with Windframe AI.
Before you begin
- Open your project in the Windframe editor.
Step 1: Open the AI input bar
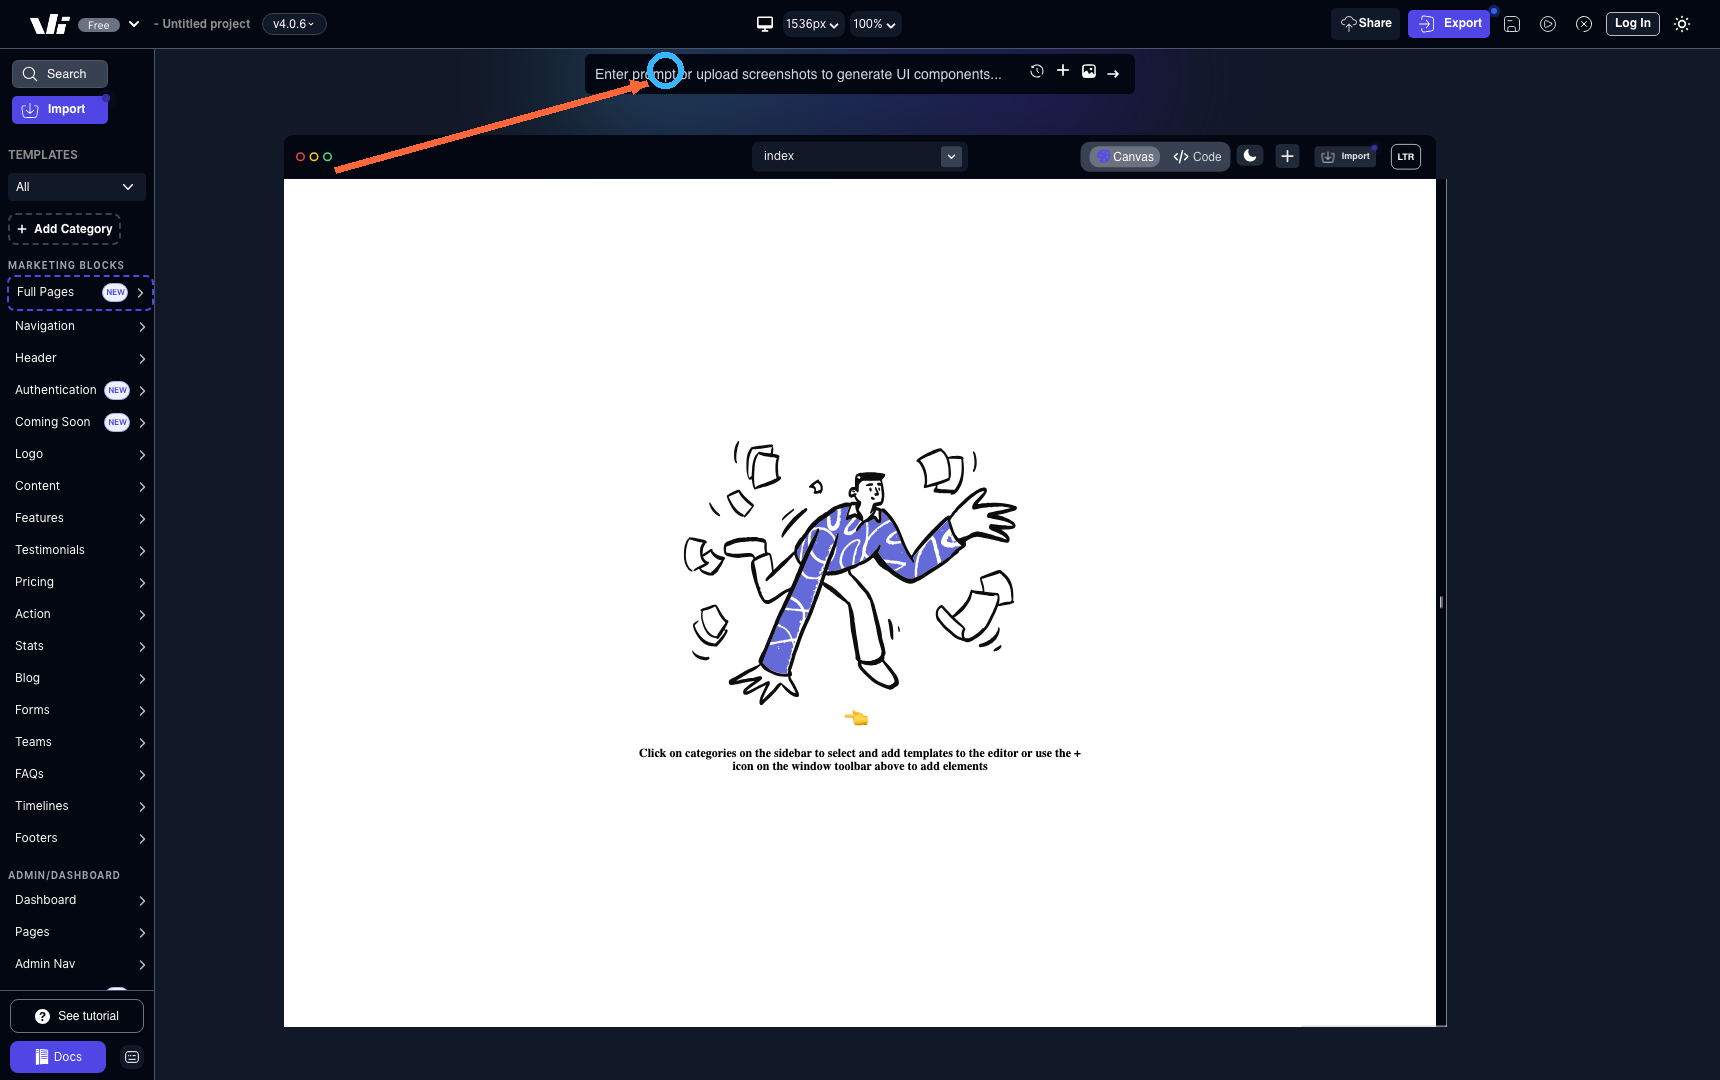
Click the AI input at the top of the editor.
After you click it, the AI generation panel opens.
Type the prompt for the section you want to generate in the input field.
Example prompt:
Landing page hero for a B2B SaaS with headline, short subtext, 2 CTAs, and trust logos.
Step 2: Choose a style and color direction
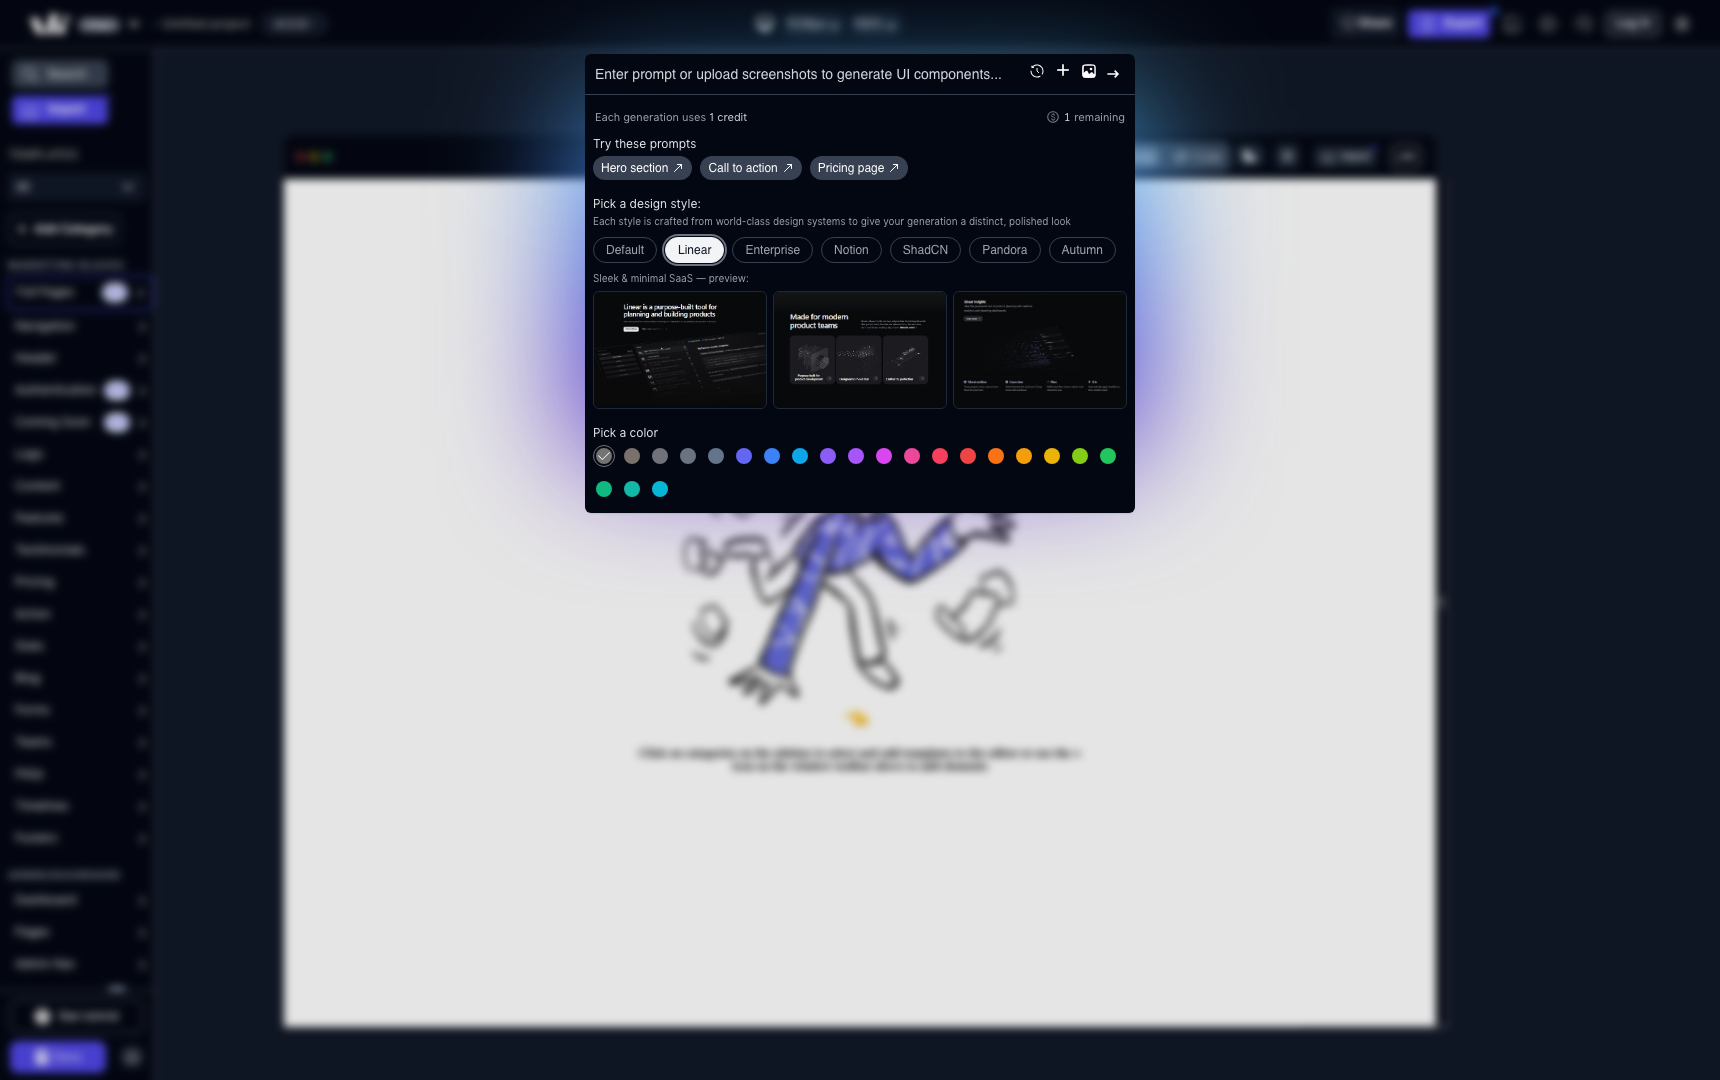
Pick your visual direction before generating.
In Windframe, styles are design directions. They control how your result looks: typography feel, spacing density, button/card treatment, and overall tone.
Style chips: Choose a style (for example Linear, Enterprise, Notion, ShadCN, Pandora, Autumn).Preview strip: See what that style looks like before you generate.Color swatches: Set the accent/color direction for the result.
If you keep the same prompt and switch styles, your generated layout style will change.
If you want style references, use:
Step 3: Generate your design

Click the generate arrow button in the AI panel.
After you click it, Windframe generates designs from your prompt and shows them on the left side as design thumbnails.
From there, you can either click Re-Generate for more options or continue refining with follow-up prompts.
Step 4: Refine with follow-up prompts
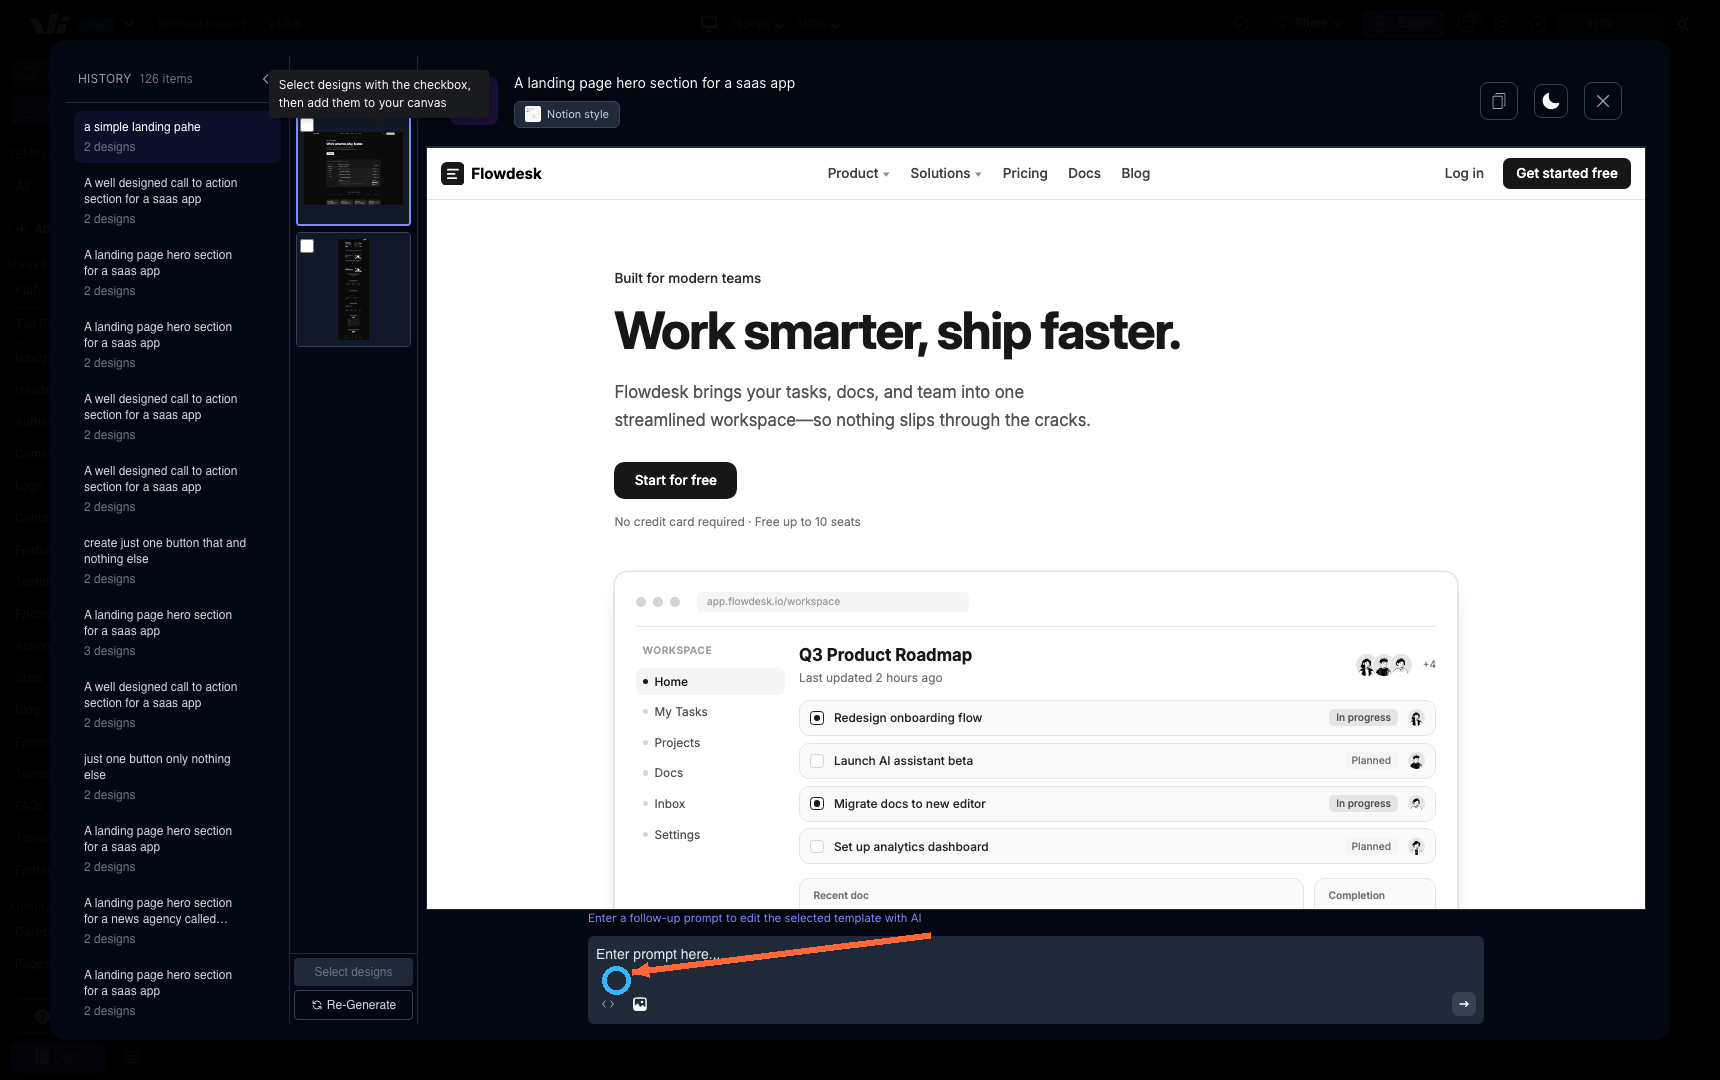
Use the follow-up input to request targeted edits to the generated result.
Examples:
Make the heading smaller and increase spacing above buttons.Keep this layout but switch to a cleaner enterprise tone.Add a 3-card testimonial row below this hero.
Step 5: Select designs and add to canvas

After refining, select one or more designs using the checkboxes in the left thumbnail list.
Once you start selecting designs, the Add to Canvas button appears at the bottom.
Click Add to Canvas to insert selected designs into your page for visual editing.
The checkboxes are only for choosing which designs to add to your canvas. You do not need to select a checkbox before exporting from the AI generation modal.
From canvas, you can continue editing and then export to your framework.
Continue here:
Step 6: Export the current AI design
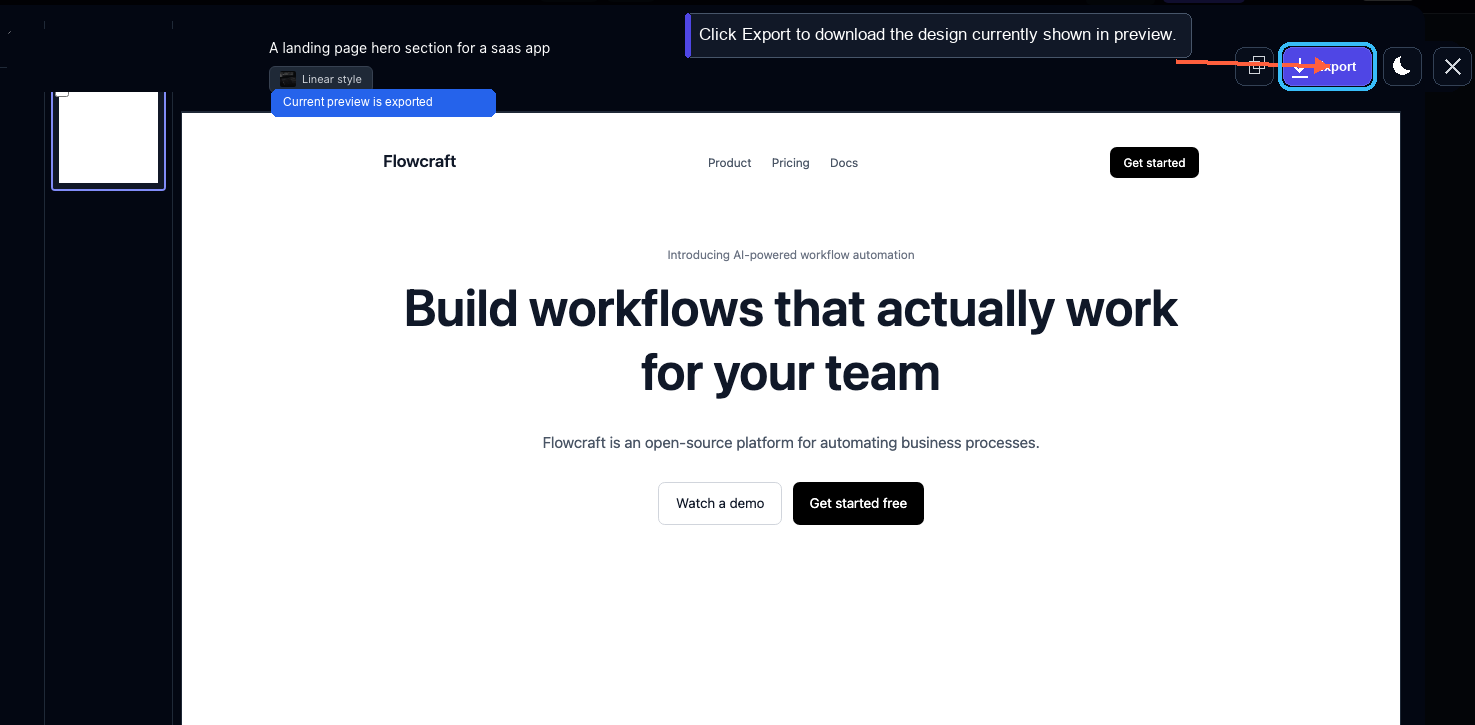
You can export directly from the AI generation modal without adding the design to your canvas first.
Click the Export button in the top-right area of the AI generation modal. It sits with the preview controls near the copy, dark mode, and close buttons.
The export action uses the design currently shown in the preview. If you click another generated design in the thumbnail list, that newly previewed design becomes the one that will be exported.
This means:
Exportexports only the current previewed design.- The checkbox selection still controls
Add to Canvas. - You no longer need to multi-select designs before exporting from the AI generation modal.
Step 7: Choose export options and generate files
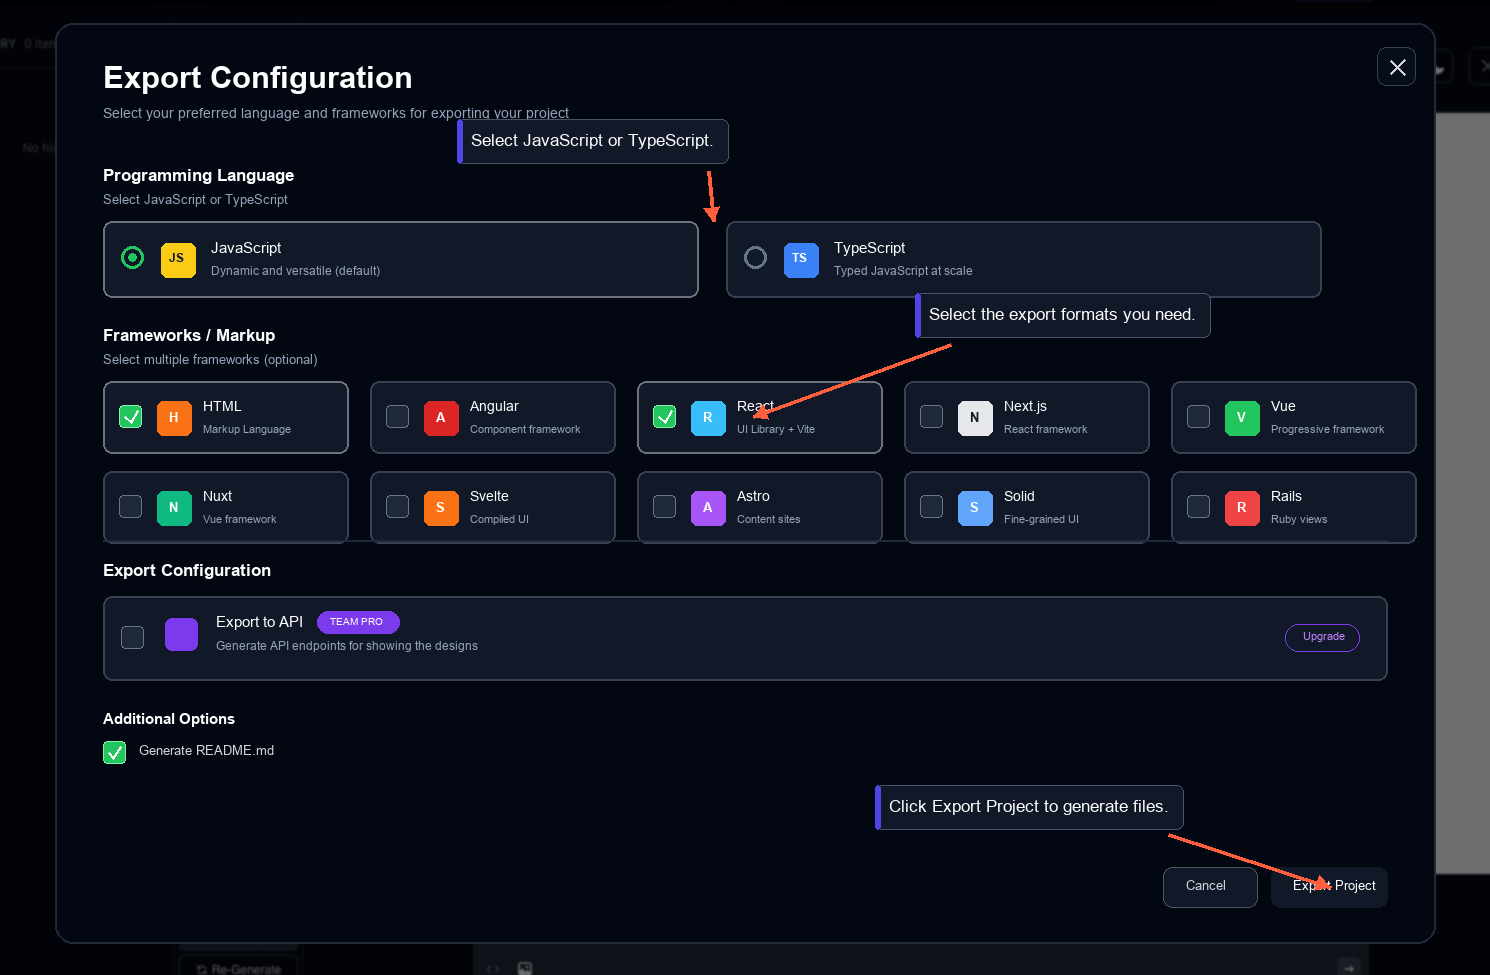
After clicking Export, the export configuration modal opens.
Use the modal to choose how you want the current AI design exported.
Select JavaScript or TypeScript as the export language.
Select the frameworks or markup formats you want to export, such as HTML, React, Next.js, Vue, Nuxt, Svelte, Astro, Solid, Angular, or Rails.
Keep Generate README.md enabled if you want setup instructions included in the export.
Click Export Project to generate the downloadable files for the current AI design.
For HTML exports from the AI generation modal, the current design is exported as the main index.html page.
Step 8: Reuse history anytime
You can always return to AI history to reopen older generations, continue refining, or add previous designs to canvas.
Related workflows
Screenshot to Code
If you already have a screenshot/mockup and want to turn it into editable UI, use:
AI Chat History
For a focused history walkthrough, use:
Full Project Export
If you want to export a design after adding it to your canvas and editing it inside the main Windframe editor, use: