Adding Elements
Learn how to add elements in Windframe with our comprehensive guide. Enhance your Tailwind CSS projects by seamlessly integrating text, images, buttons, and more using Windframe intuitive visual editor.
How to Add Elements in Windframe
Windframe provides a variety of pre-built HTML elements that can be easily added to your project. These elements are fully customizable, allowing you to create structured and visually appealing designs without starting from scratch.
Below are the key types of elements you can work with in Windframe:
Main
Represents the primary content section of a page (HTML5 <main>). In Windframe, this element defines the core content area of your design.
Forms
Used to collect user input. Includes fields, buttons, and other form controls to facilitate interaction.
Tables
Displays tabular data in a structured row-and-column layout.
Container
A flexible layout wrapper that helps organize and align content for responsive designs.
Follow these steps to add an element in Windframe:
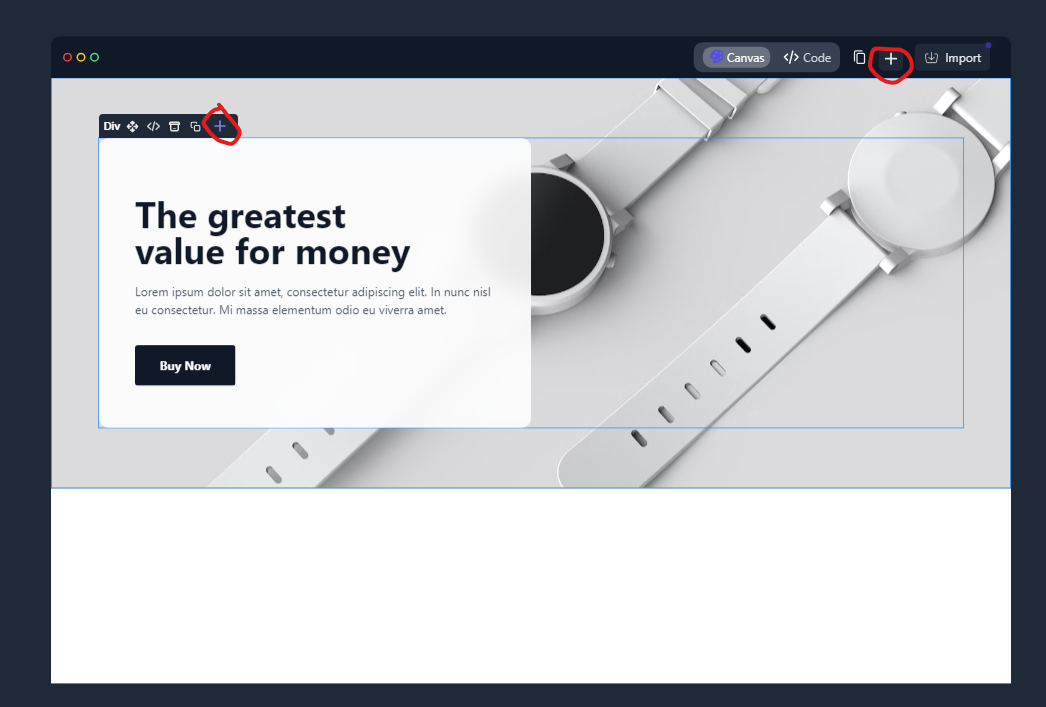
Step 1: Click the "+" button in the toolbar.
Step 2: A list of available elements appears — choose the one you want (text, image, button, form, etc.).
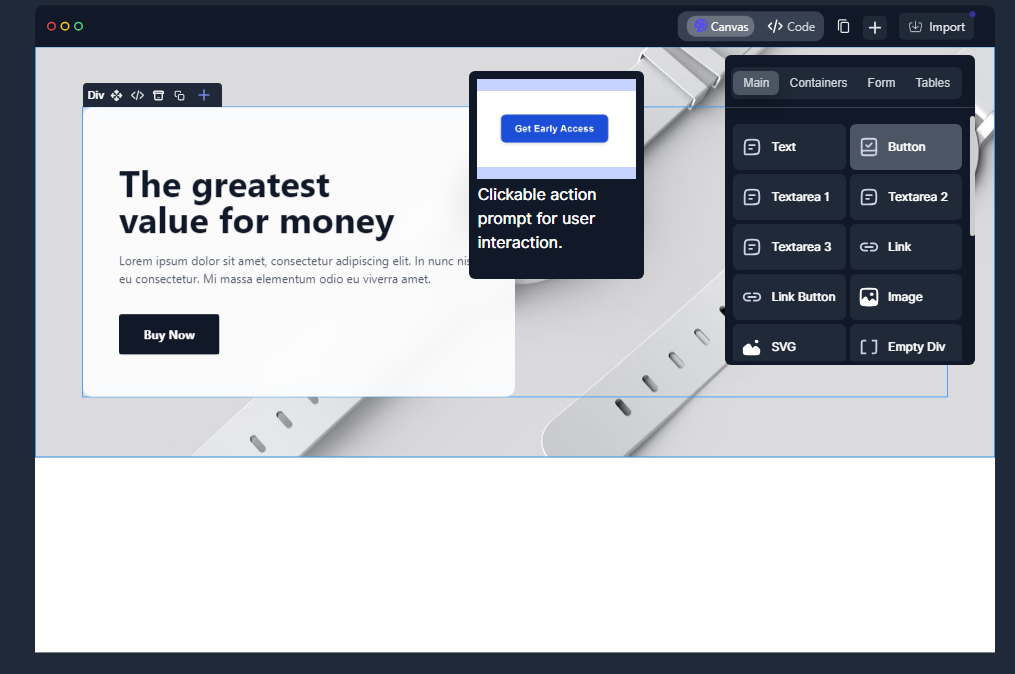
Step 3: The element will be inserted inside the container or div you have selected.
Step 1: Select the element you just added.
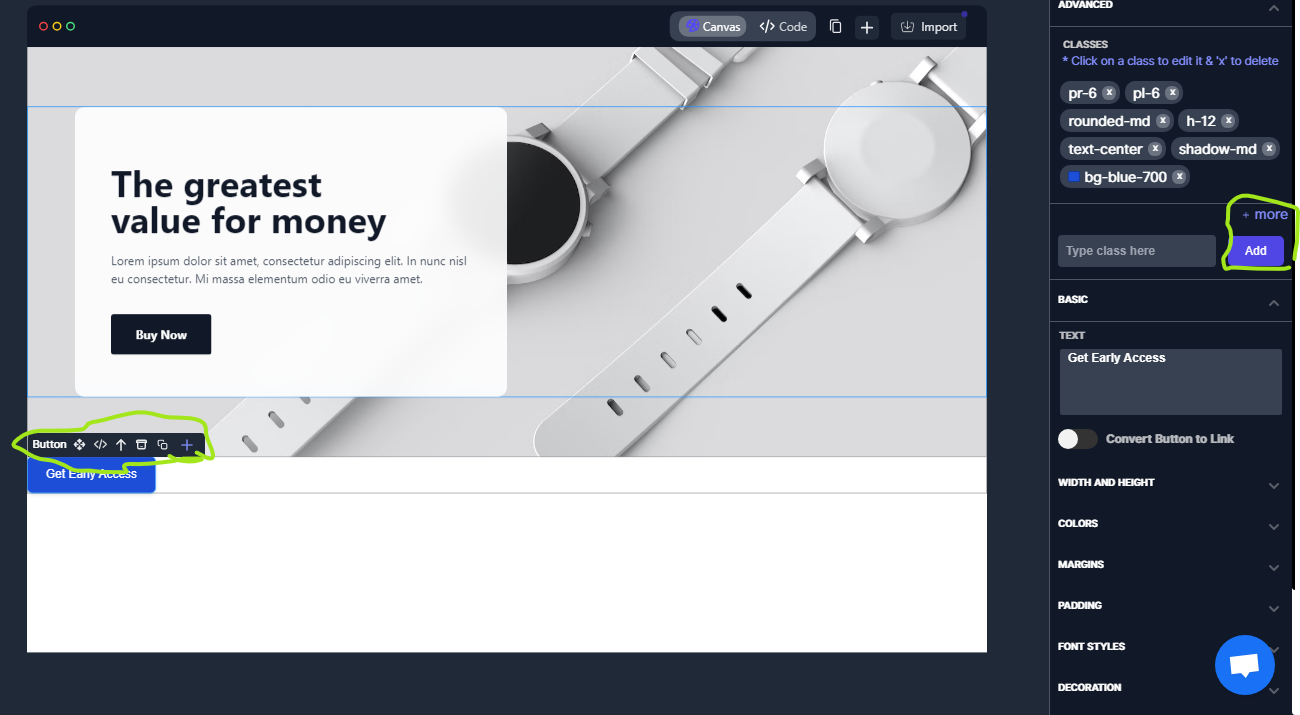
Step 2: Use the "Add" button in the left-hand sidebar to modify its content, style, or behavior. You can:
- Change text
- Adjust colors
- Add links
- Adjust spacing or other styles
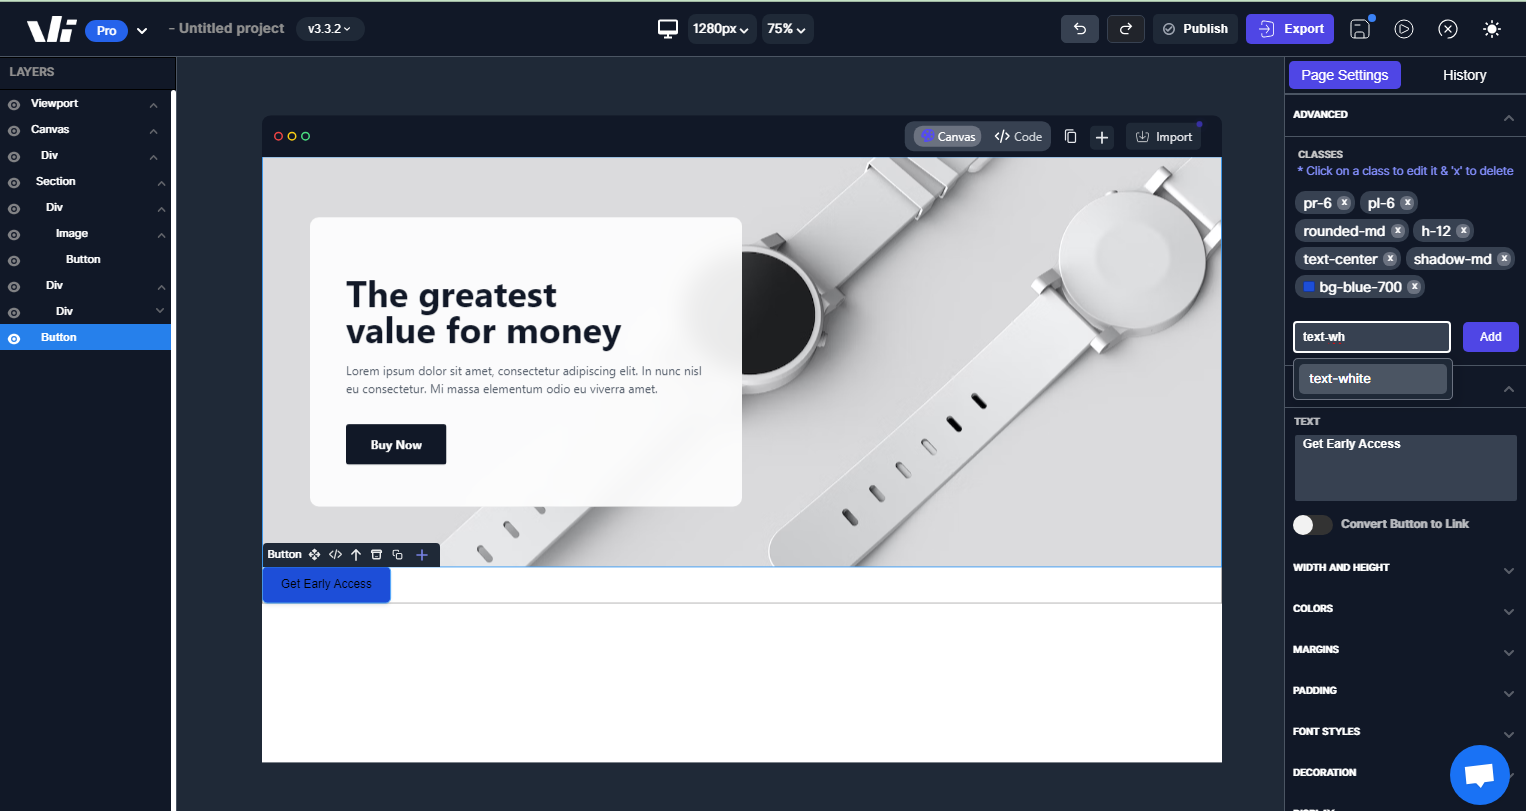
Windframe features automatic saving — any changes you make are saved in real-time, so you won’t lose progress.
Best Practices
-
Place elements inside containers for better responsiveness.
-
Use semantic HTML elements (like
<main>,<section>,<footer>) for accessibility and SEO. -
Keep styles consistent with your project's theme.