Adding SVG to project
Integrating SVG images into your Windframe projects can enhance the visual appeal and scalability of your designs. Here is how you can add SVGs to your project
Adding SVGs to Your Project in Windframe
Overview
SVGs (Scalable Vector Graphics) are a lightweight, high-quality image format ideal for crisp icons, illustrations, and shapes at any screen size. Windframe makes it simple to add, customize, and manage SVGs directly in your project without losing image quality.
Step 1: Open the Windframe Editor
- Log in to your Windframe account.
- Navigate to your project dashboard.
- Open the project where you want to add the SVG.
Step 2: Add the SVG to Your Page
-
Navigate to the page where you want to add the SVG.
-
Locate the component where you want to insert the SVG.
-
Add an element to the component by clicking the component.
-
Click on 'Add Element' tool bar that pops up on the edge of the component.
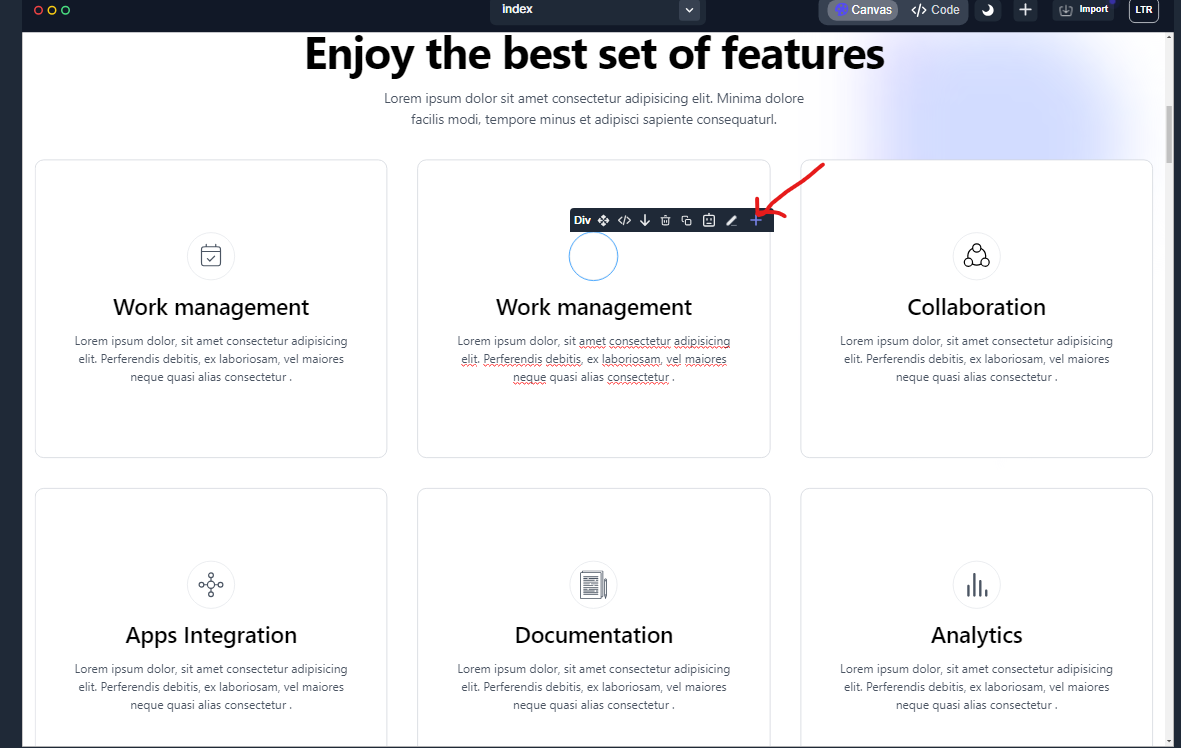
- Then select the svg element on the add element toolbar dropdown.
Step 3: Choose your svg
-
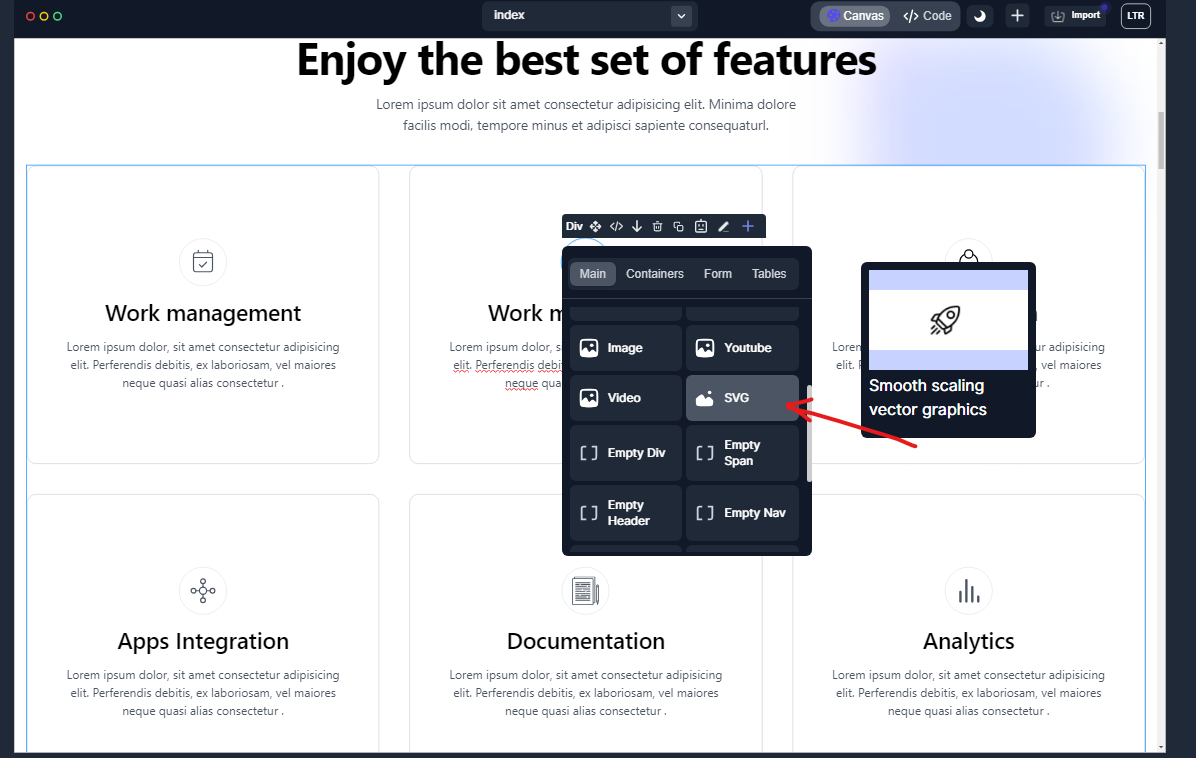
click on the svg element, A page setting sidebar will appear.

-
on the Page Setting, Go to the Text area and click on the "Add SVG" below the Text bar.
- A dropdown of all the SVG will appear with a search bar, Go ahead and search for the SVG you are looking for.
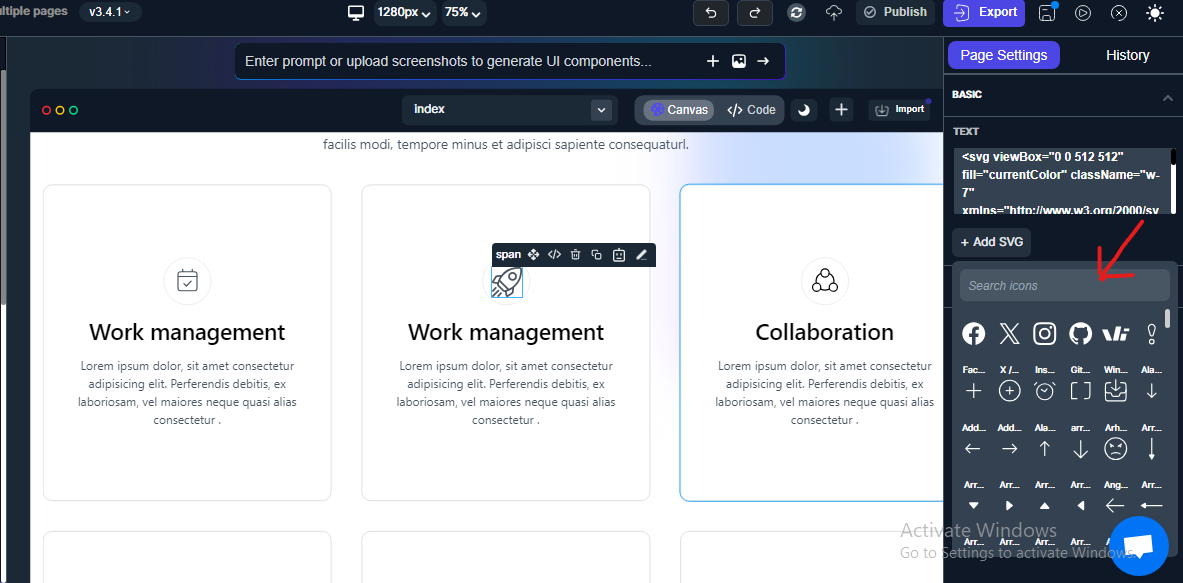
- Select the SVG you wish to use
Step 4: Customize the SVG
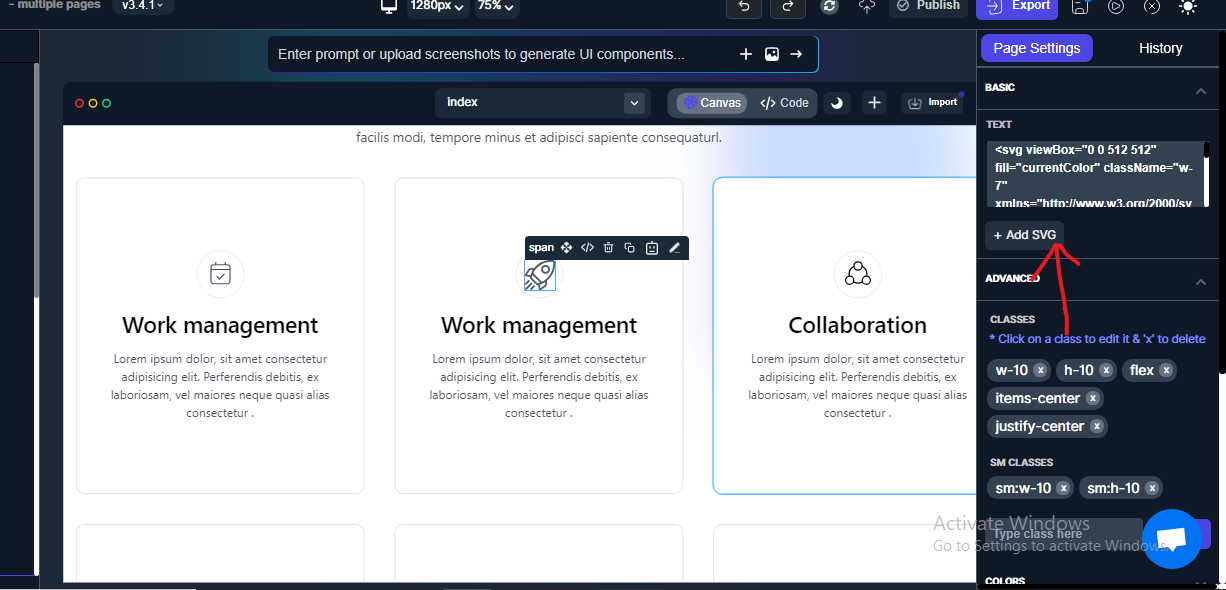
- With the SVG selected, you can customize its size, alignment, and other classes using the options available in the Advanced options in the Page Setting sidebar.

Step 5: Adding your own SVG
- You can also add your own SVG by simply pasting it on the Text bar found on the page setting.

Step 6: Save and Preview
- Save your changes regularly to ensure your work is not lost.
- Your SVG will appear immediately on the page you are working on
- You can also preview your whole page by clicking on the "Preview" button.
✅Best Practice Tips
-
Use SVGs for icons, illustrations, and shapes to maintain crisp quality on all screen sizes.
-
Keep SVGs lightweight by removing unnecessary metadata before upload.
-
Test responsiveness by previewing on different screen sizes.