Adding UI library in Windframe
Integrating UI libraries into your Windframe projects can significantly enhance your development workflow by providing pre-designed, customizable components.
The Windframe editor allows you to create and manage your own UI libraries. These libraries consist of reusable custom codes and templates, categorized into block sections, specifically designed for building the UI of your web application projects. Creating a UI library using your custom templates helps you save time and effort by eliminating the need to redesign these reusable templates within the Windframe editor.
Creating a UI Library in Windframe
To add a UI library in the Windframe Editor, follow these steps:
Step 1: Open the Windframe Editor and login to your account.
Step 2:. Locate the toolbar at the side of the editor interface.
Step 3: Click on the menu highlighted in the image below.
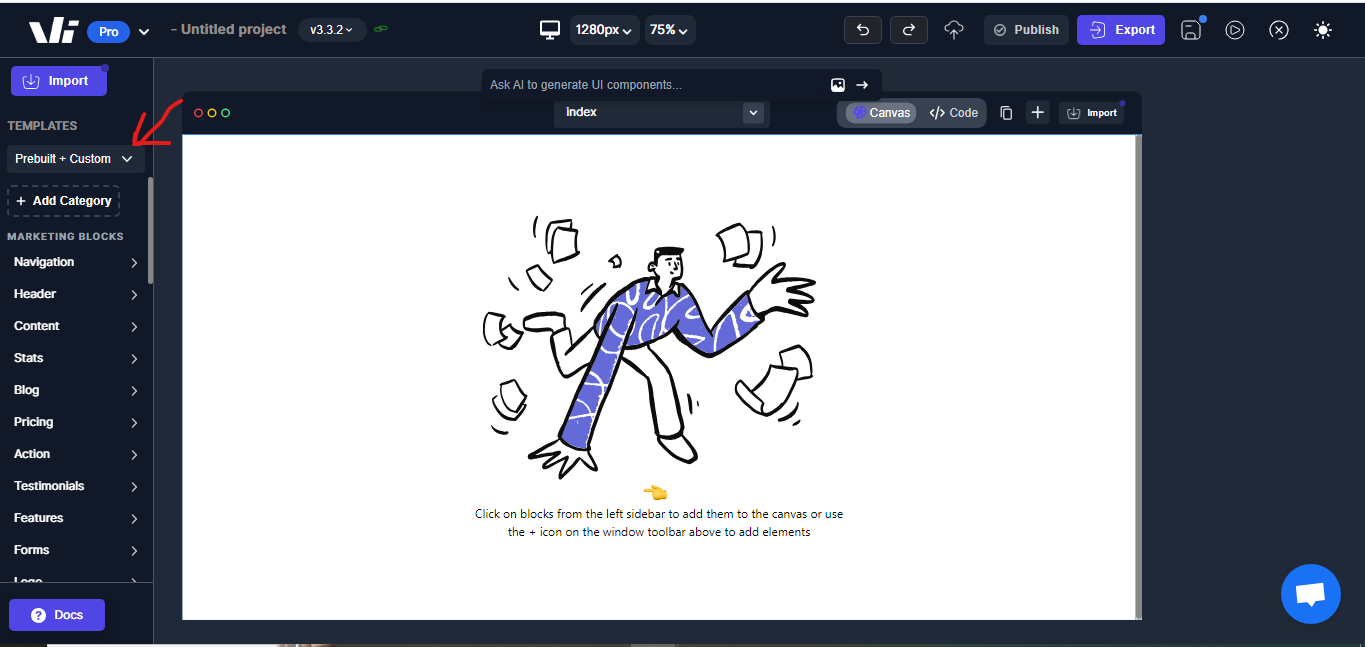
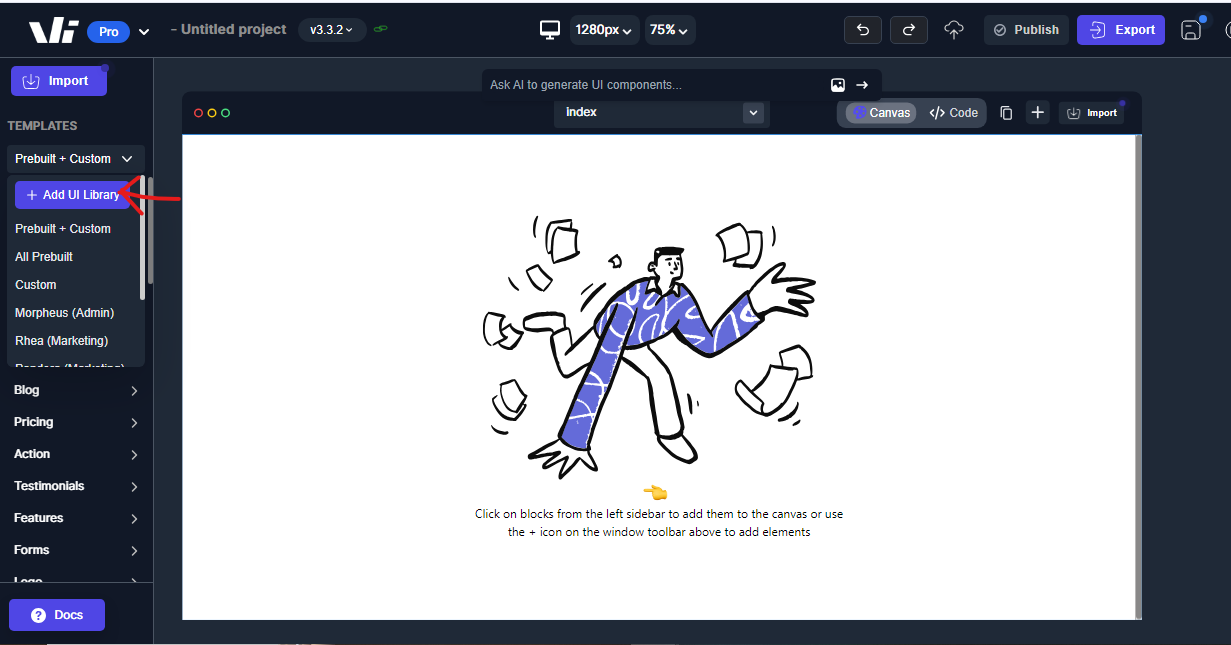
Step 4: Click on the "Add UI Library" button.
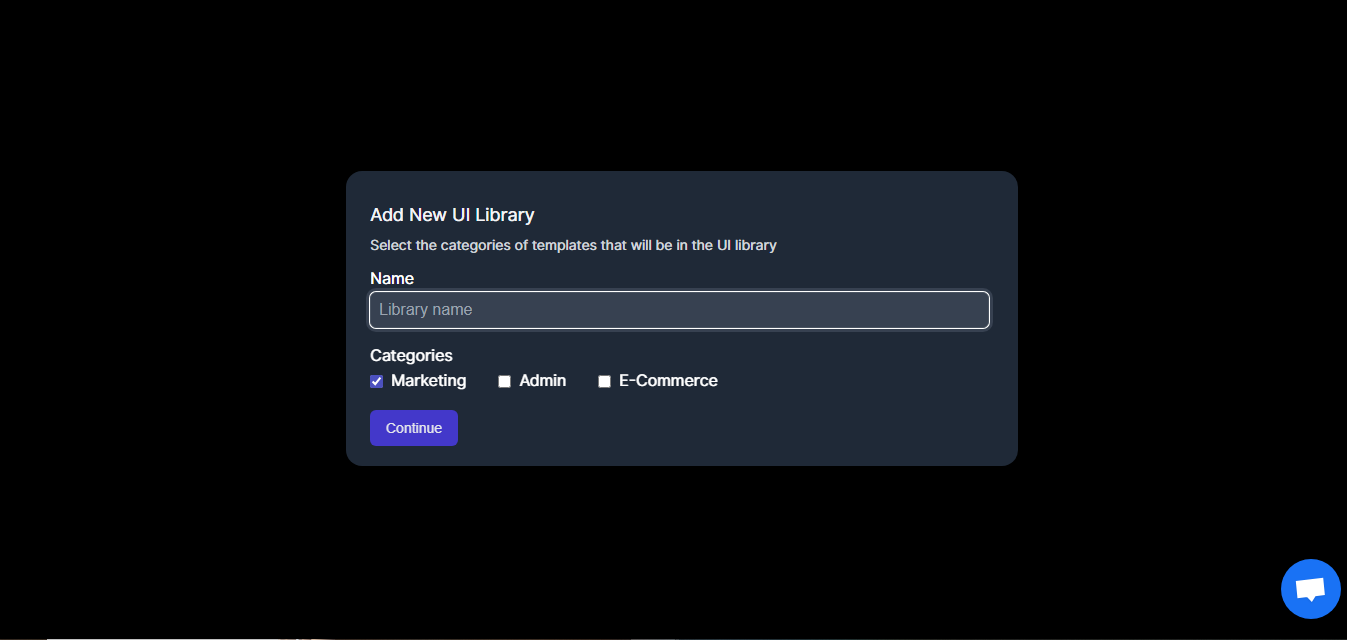
Step 5: You will be prompted to name your UI library and select the block sections you want to add.
Step 6: Windframe will will generate template lists (or categories) based on the block sections you selected for your UI library. You can then customize these template lists by adding your custom templates to each one. Follow the steps on this page on how to import custom templates in Windframe.
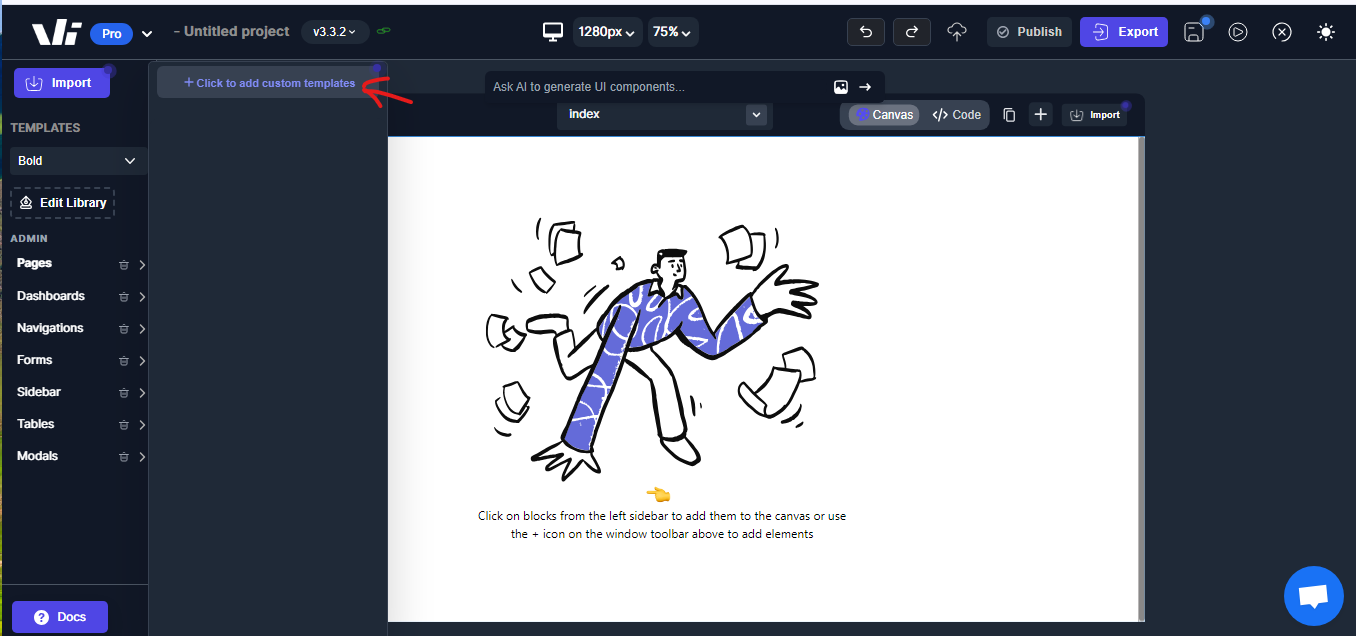
You can add and delete block sections and template lists (or categories) using the "Edit Library" button.
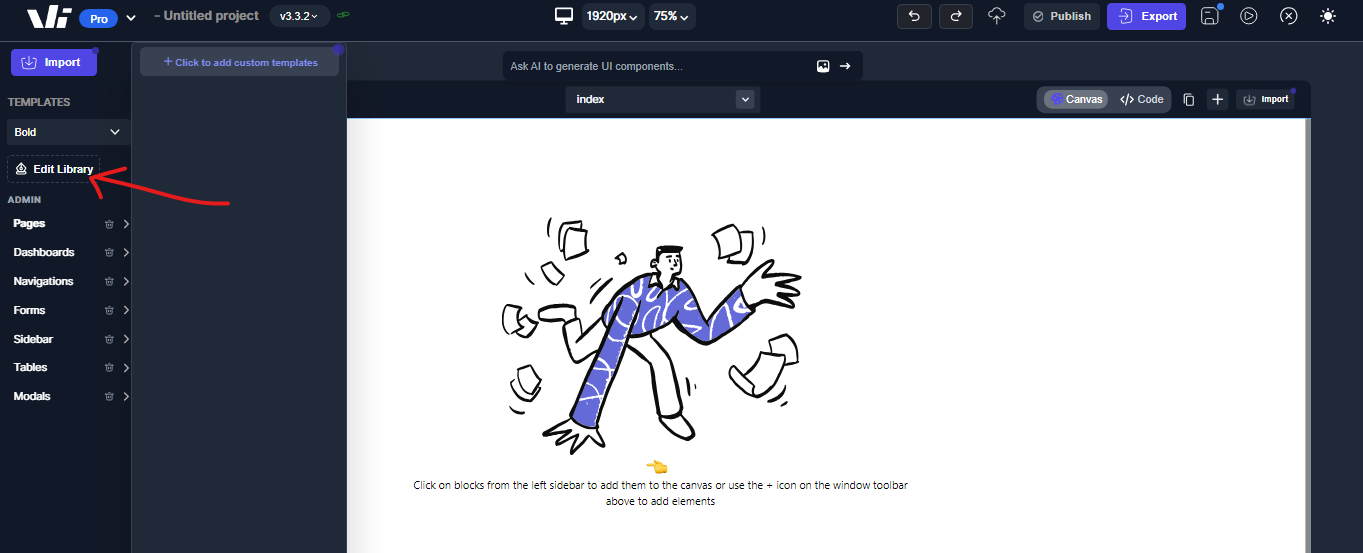
And also delete template lists (or categories) by clicking the delete button beside them.
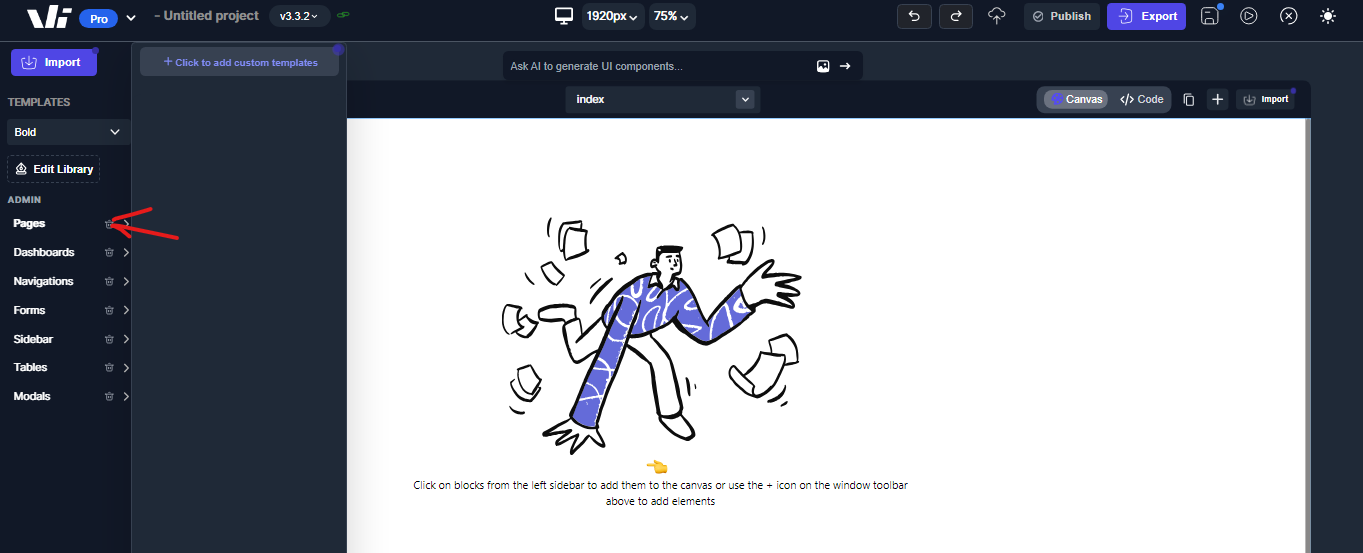
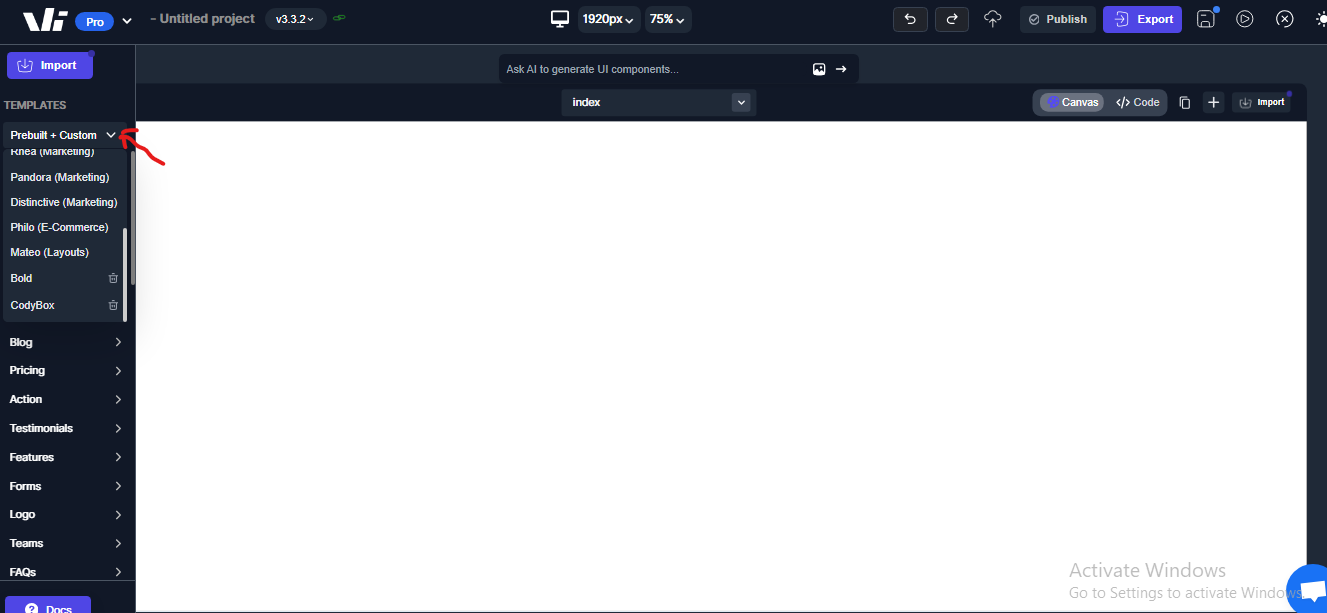
_Note: You can access both Windframe UI libraries and your UI libraries from the menu at the left sidebar of the editor. _
 .
.
Selecting an Existing UI Library
To select an existing UI library in Windframe, follow these steps:
Step 1: Open the Windframe editor and navigate to the toolbar at side of the editor interface
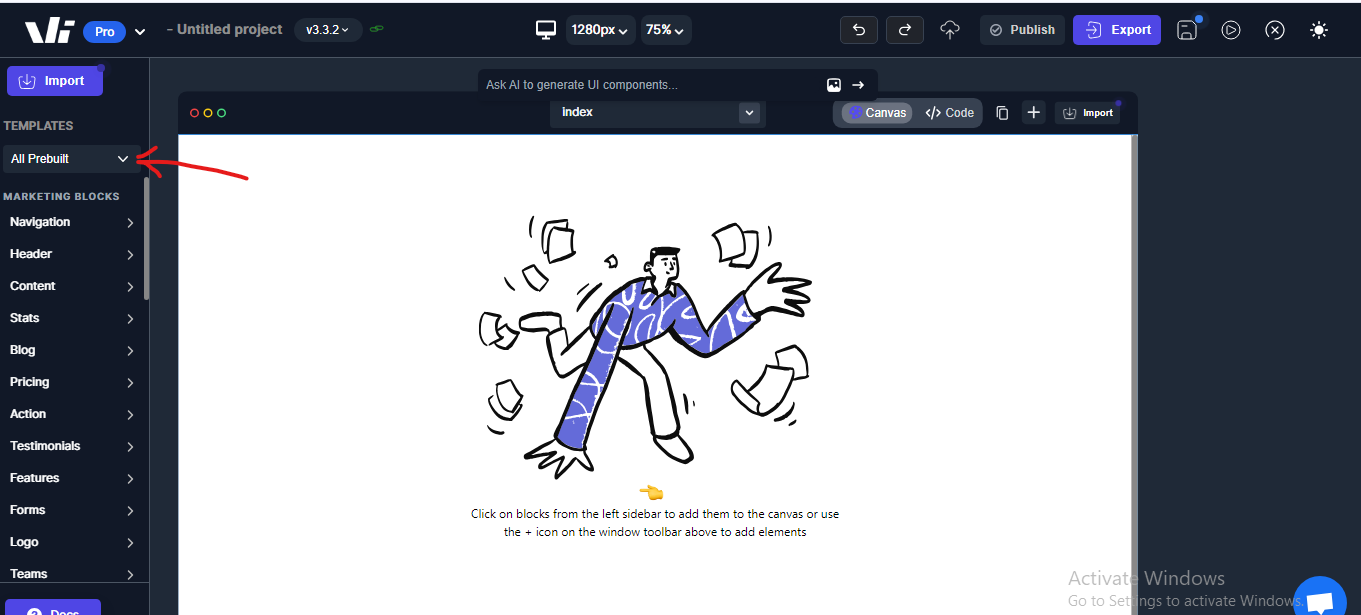
Step 2: Click on the menu to access the UI libraries available.
 .
.
Step 3: In the drop down, select the desired UI Library from the available options in the menu.
 .
.
The selected UI library will now be active, and you can start using its templates in your project.
Editing a Custom UI Library
To edit a custom UI library in Windframe, follow these steps:
Step 1: Open the Windframe editor and navigate to the toolbar at the side of the editor interface
Step 2: Click on the menu below the import button to access the UI Libraries.
 .
.
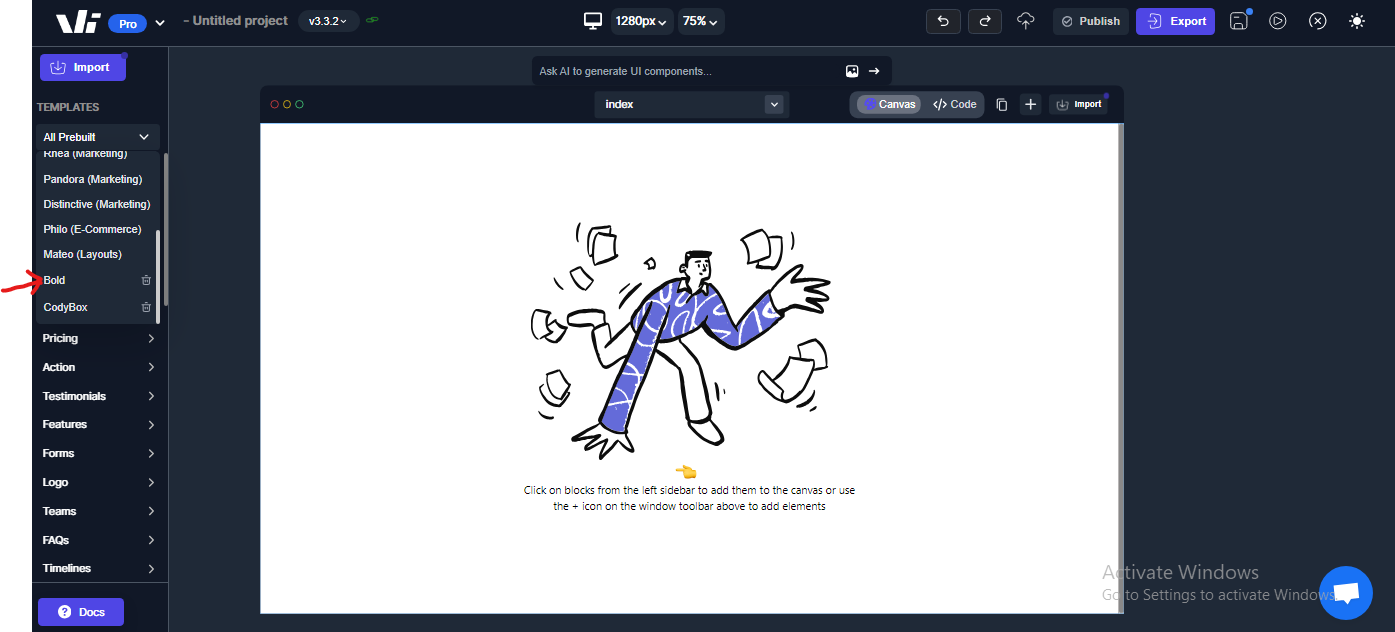
Step 3: In the drop down options, select the custom UI library you want to edit.
 .
.
Step 4: Click on the "Edit Library" button below the selected UI library.
 .
.
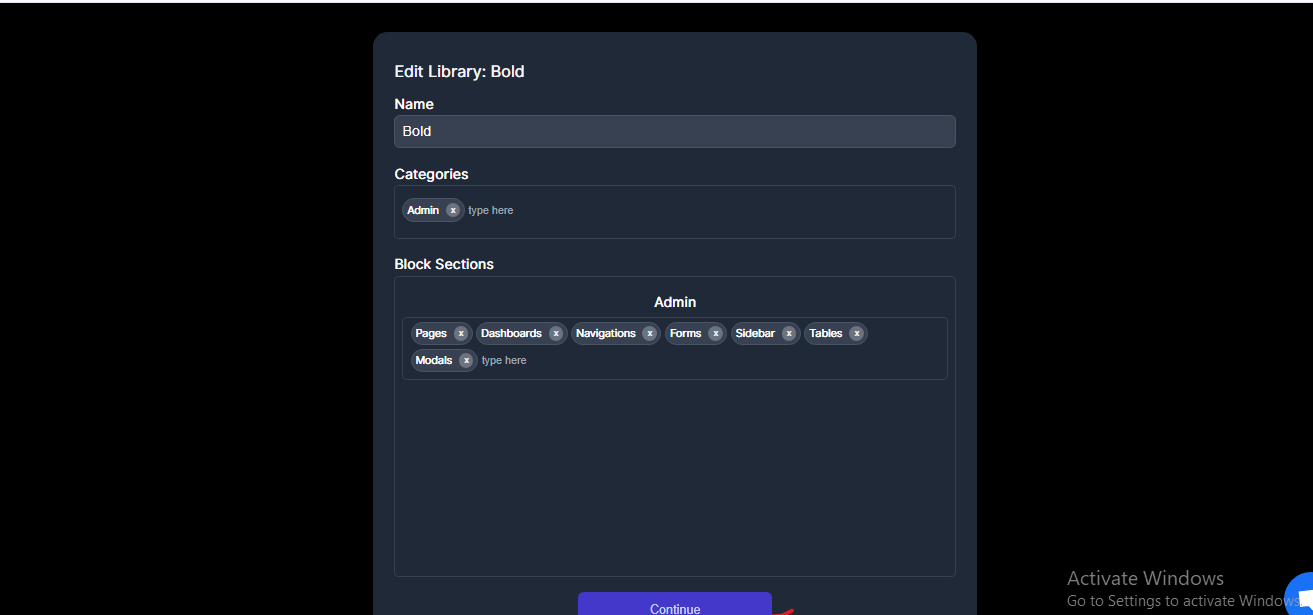
Step 5: You can make changes by adding or removing block sections, and also add or delete template lists (or categories) from block sections.
 .
.
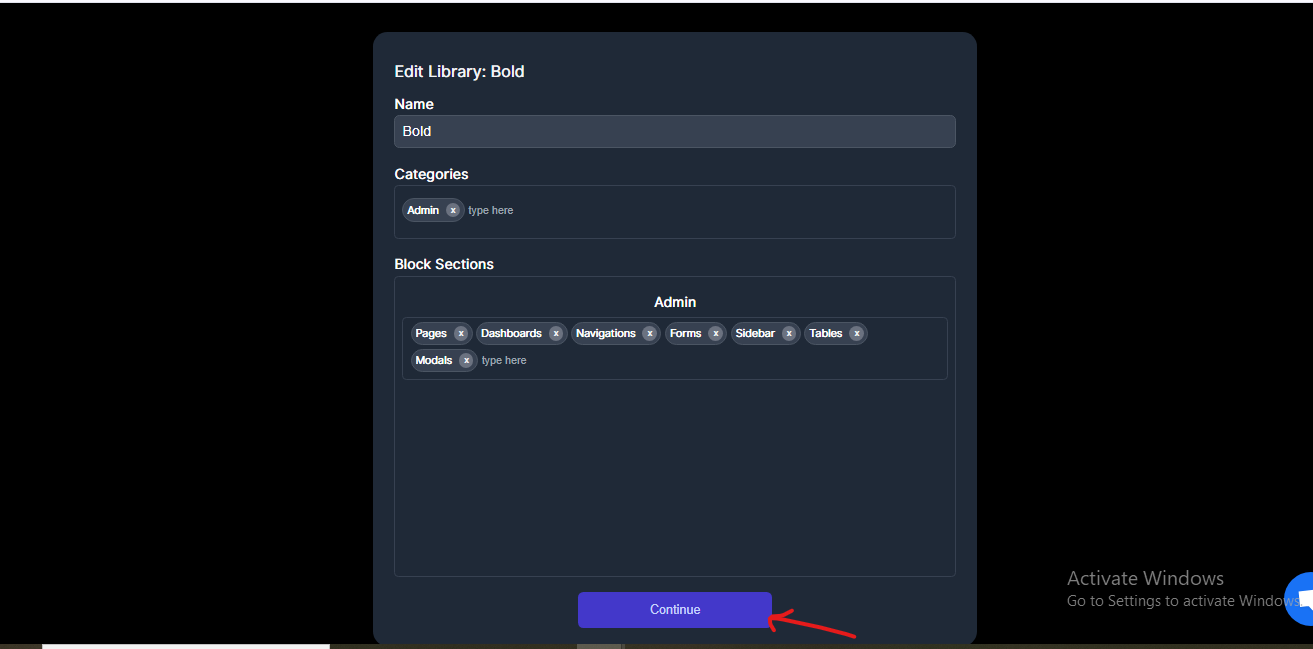
Step 6: Click on the "Continue" button to save the changes to the custom UI library.
 .
.
Deleting an Existing Custom UI Library
To delete an existing custom UI library in Windframe, follow these steps:
Step 1: At the Tool bar of the windframe editor, Locate the filter.
Step 2: Click on the menu to see all the available UI libraries in Windframe, including your own custom UI libraries.
 .
.
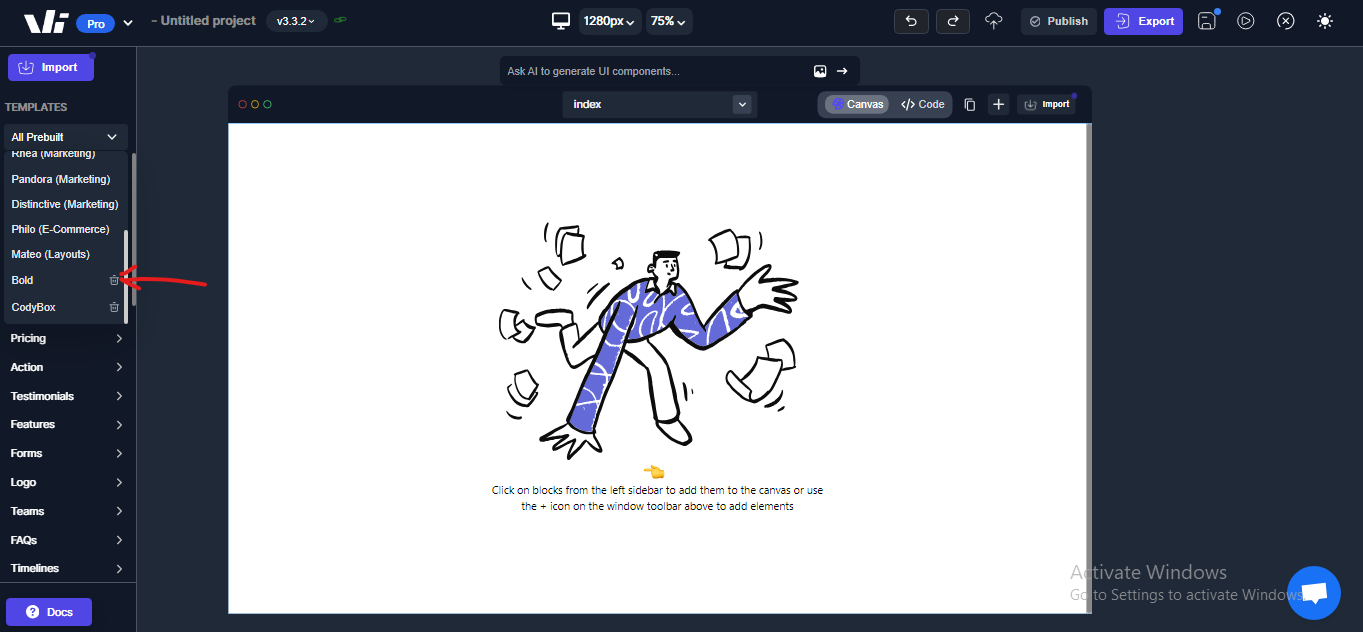
Step 3: Scroll to the custom UI libary you wish to delete and click on the delete icon beside it
 .
.
_Note: Deleting a custom UI library will remove all its templates from Windframe. _
Adding and Deleting Custom Categories
Windframe offers users the ability to create custom categories independently of creating a UI library. These custom categories are template lists - collection of reusable custom templates - created by users. These templates are exclusively added to Windframe's custom UI Library, neatly categorized within the prebuilt block sections available in Windframe, which are Marketing, Admin, and E-Commerce. This feature can only be accessed withtin the "Prebuilt + Custom" and the "Custom" UI libraries.
To add a custom category in a UI library in Windframe, follow these steps:
Step 1: Locate the toolbar at side of the Windframe editor interface.
Step 2: Click on the menu to access the UI library options.
 .
.
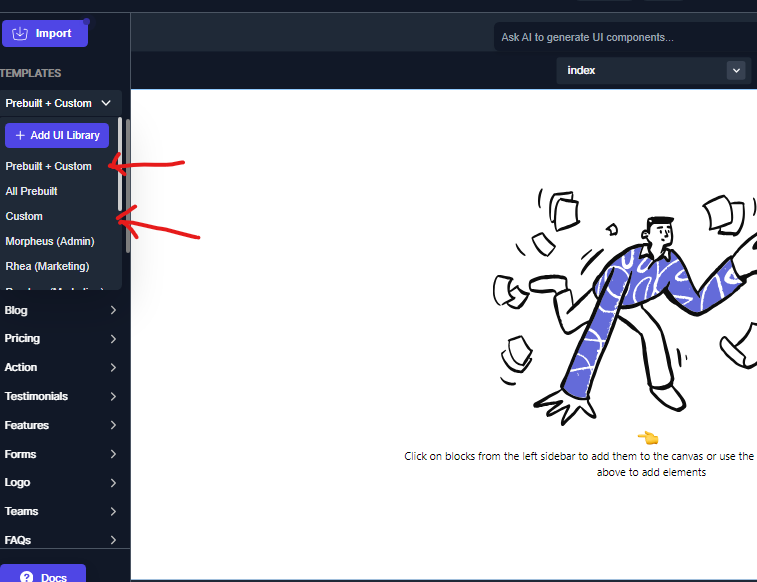
Step 3: In the menu options, select the "Prebuilt + Custom" or the "Custom" Options.
 .
.
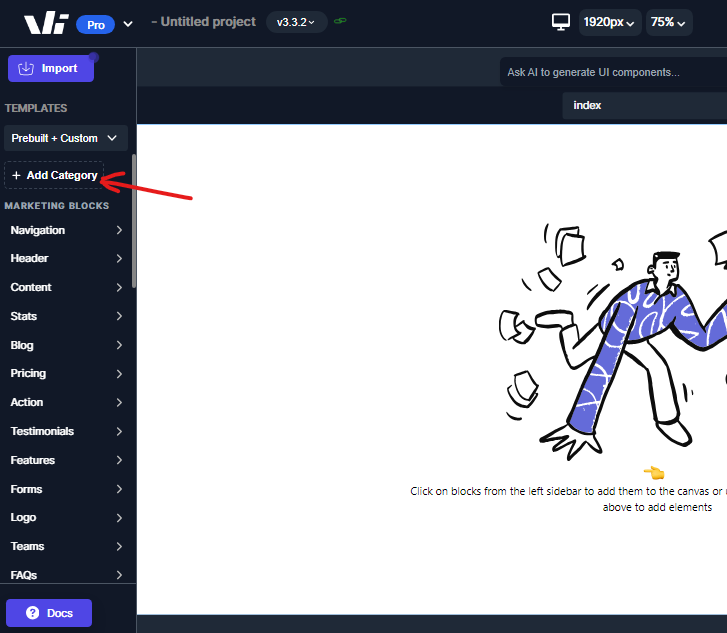
Step 4: . Click on the "Add Category" button below this option you selected.
 .
.
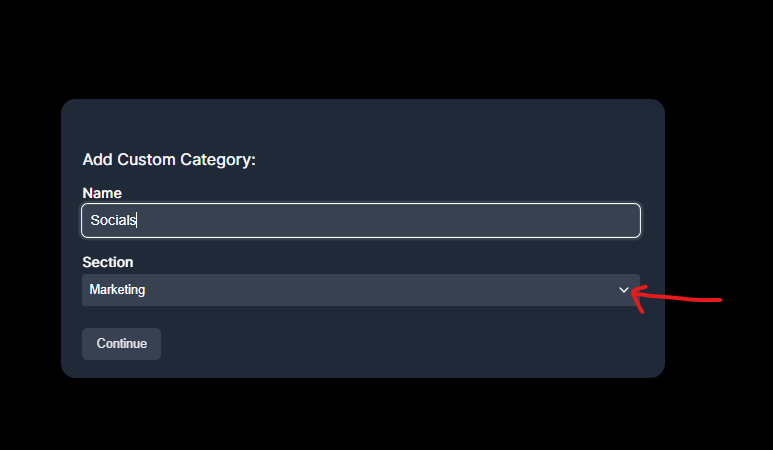
Step 5: Provide a name for the custom category and select the block section you want this category to be.
 .
.
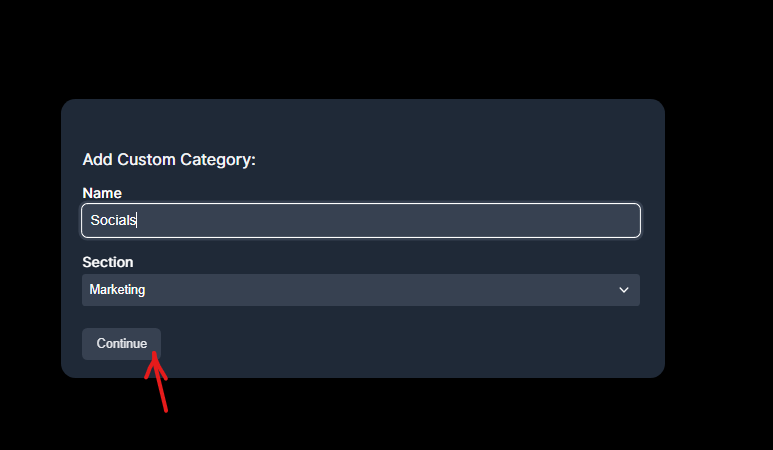
Step 6: Click on the "Continue" button to add the custom category to the UI library.
 .
.
Deleting a custom category involves the same process as removing a category within a custom UI library. Simply click the delete icon next to the respective category.