History
Windframe Project History feature enables you to track and manage different versions of your projects, facilitating easy restoration to previous states.
How to access project history on windframe
You can access the history of your projects on Windframe by following these steps:
Step 1: Open Windframe editor.
Step 2: upload or select your template
Step 3: To add your project to the history, click on the "save your work" button on the top left side of the toolbar.

Step 4: Look for the "History" section or tab, located in the right sidebar of the editor when you are selecting a section of your template and click on it.
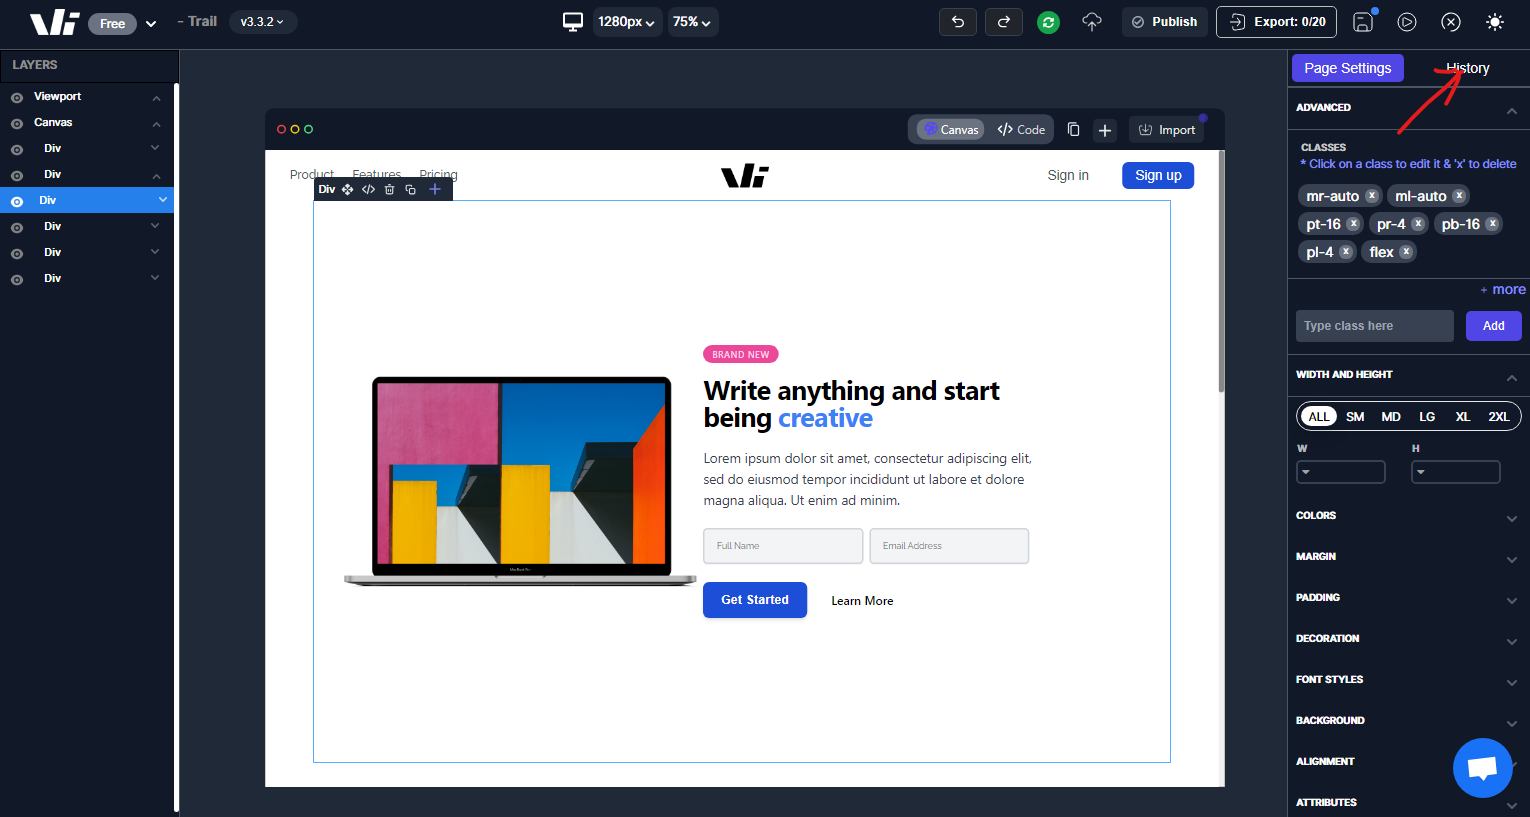
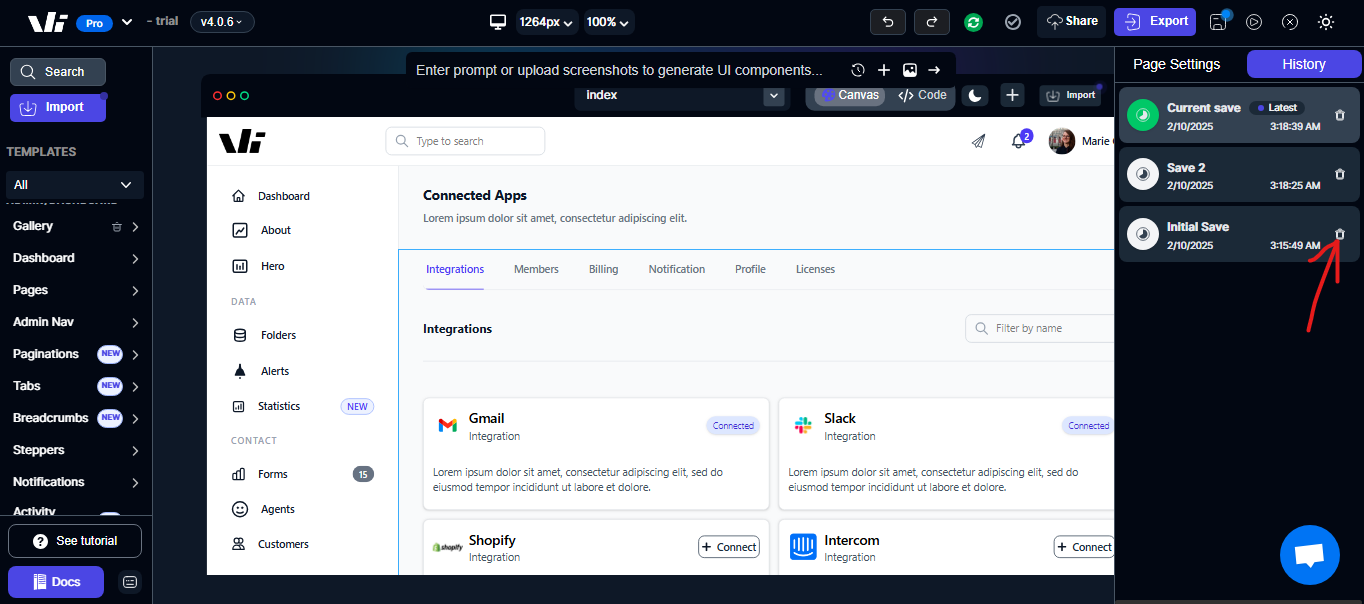
Step 5: You will see the current history you are on and other history saving you have carried out on that project.
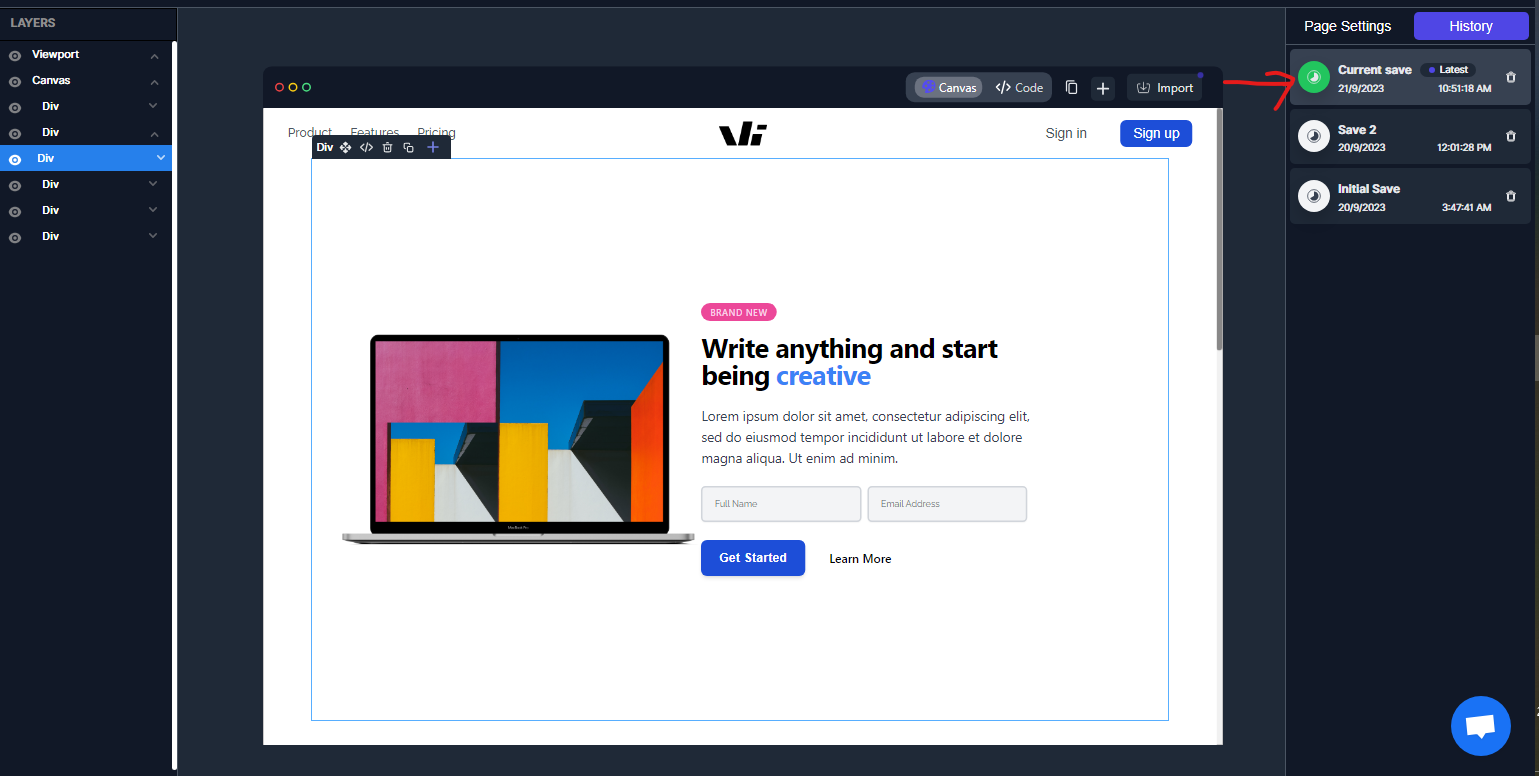
In the project history, you will be able to see a list of all the previous versions and changes made to your projects. You can view the details of each version, including the date and time of the change.
Deleting a History Entry
If you want to remove old or unnecessary saves:
-
Open the History panel on the left side of the canvas.
-
Each history entry has a Delete (trash) icon directly beside it.
-
Click the delete icon next to the entry you want to remove.
-
The selected history entry will be permanently deleted.
Important Notes
-
Windframe automatically saves your progress, so you don’t need to manually create history entries.
-
Restoring a previous state does not delete your current project; you can always return to the latest version.
-
Deleting a history entry is permanent and cannot be undone.
-
Use deletion to keep your history panel organized and focused only on the saves you want to keep.