Adding Custom fonts on Windframe
Learn how to add custom fonts in Windframe with our step-by-step guide. Enhance your designs by integrating unique typography seamlessly into your Windframe projects.
Adding Fonts in Windframe
Windframe supports full font customization, allowing you to use either its built-in font collection or your own custom fonts. This gives you creative control over typography and helps you create a unique, personalized look for your designs.
🚀 How to Use
Using Predefined Fonts
- Select the Text — Click the text element you want to change in your project.
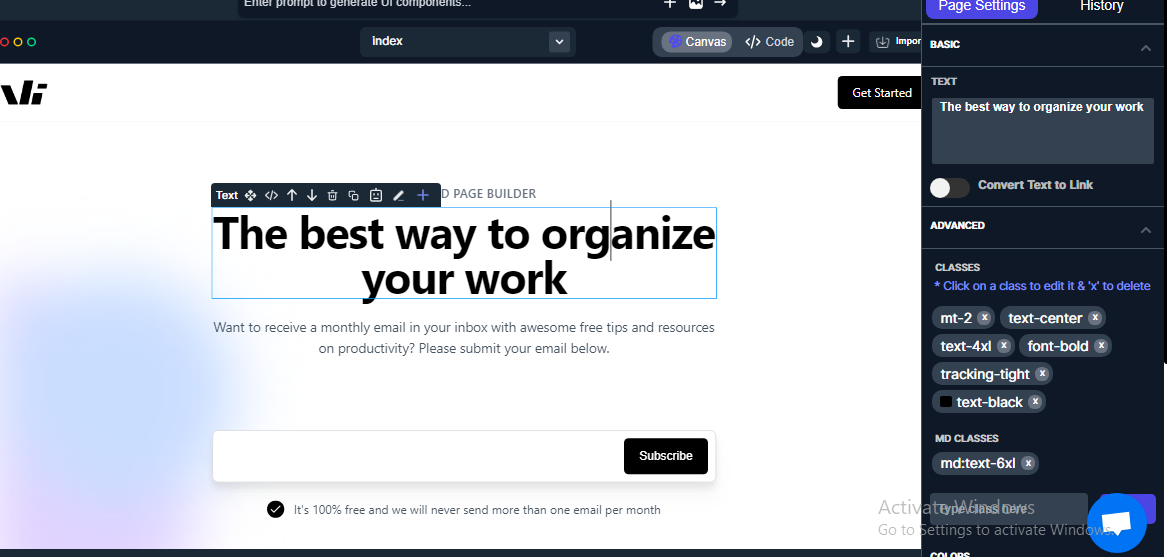
- Open Fonts Menu — In the right sidebar of the Windframe editor, click the
Fontsmenu.
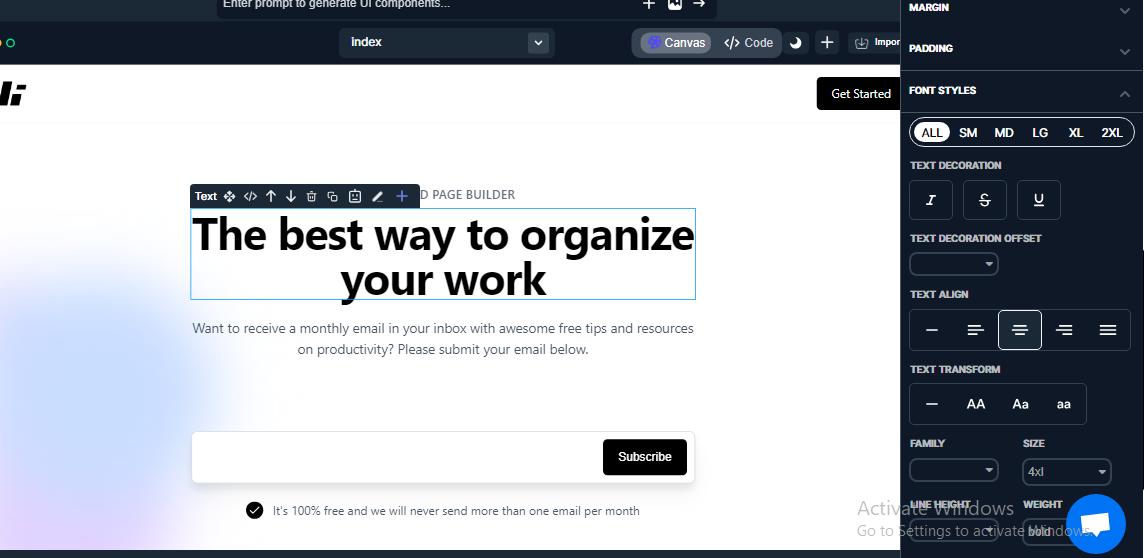
- Locate the Font Family Bar — Open the dropdown from the font family bar.
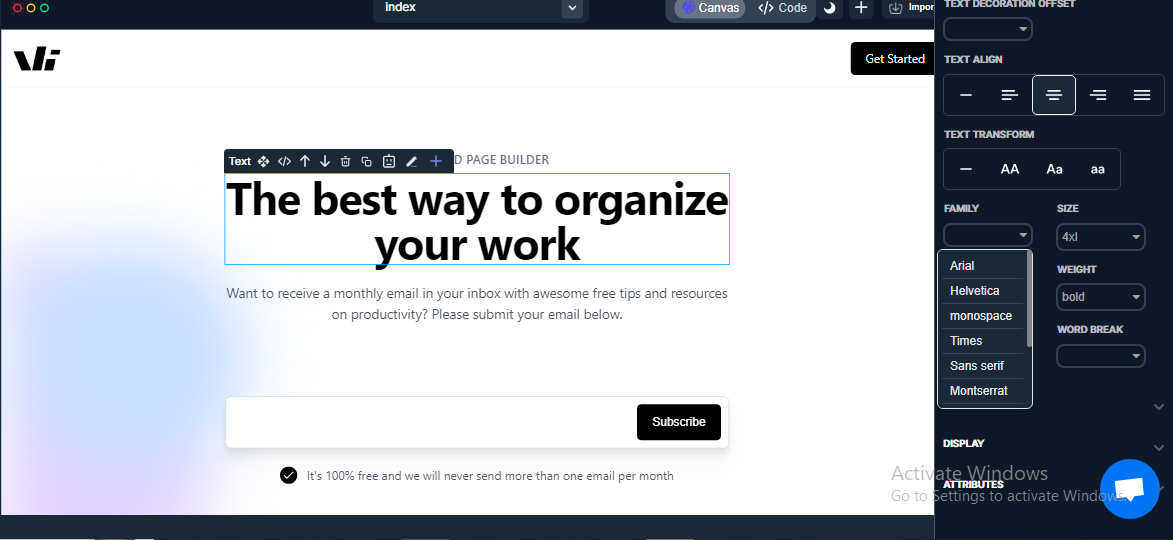
- Choose a Predefined Font— Select one of Windframe’s built-in fonts from the list.
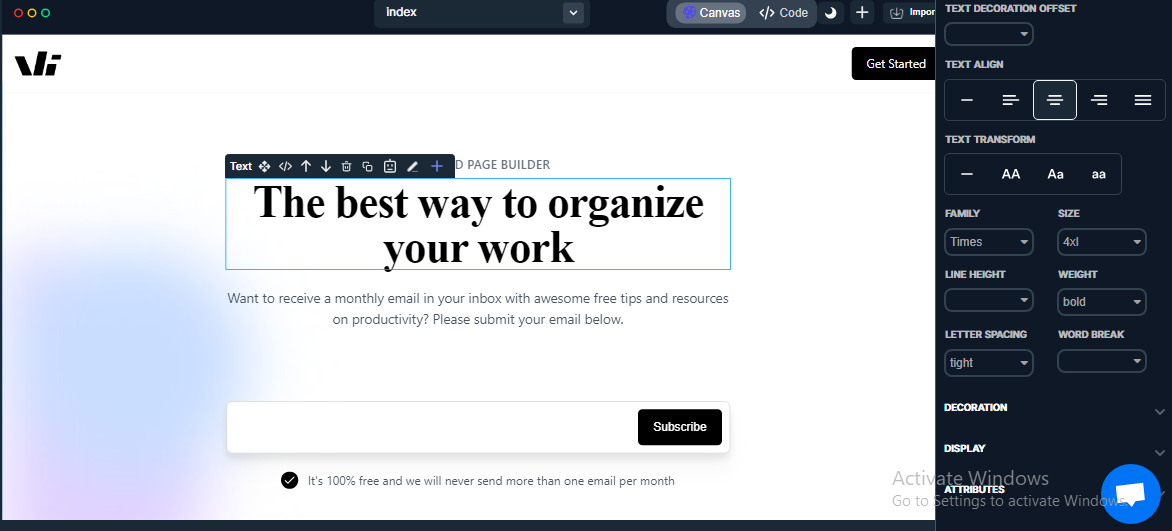
Adding Custom Fonts
- Click the Import Button— Located at the top right corner of the canvas.
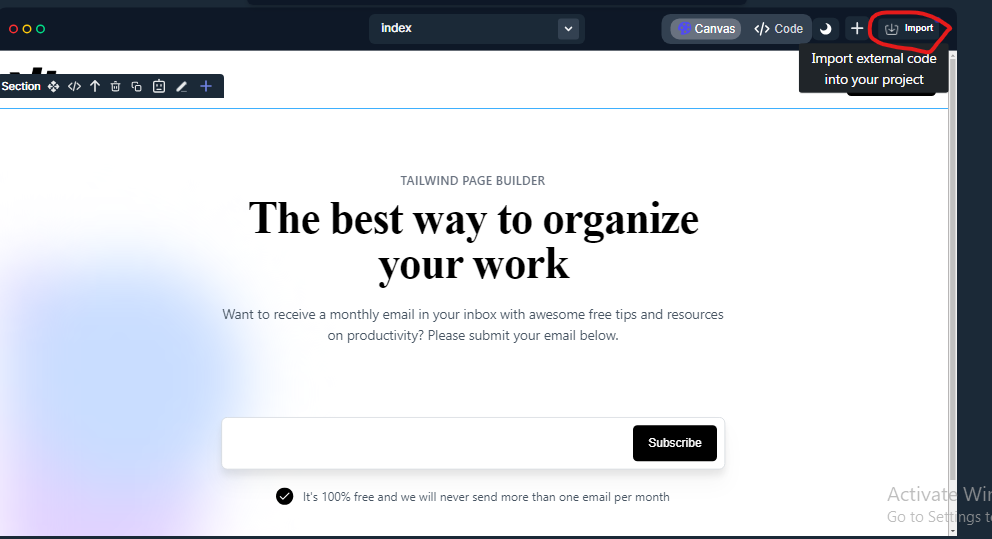
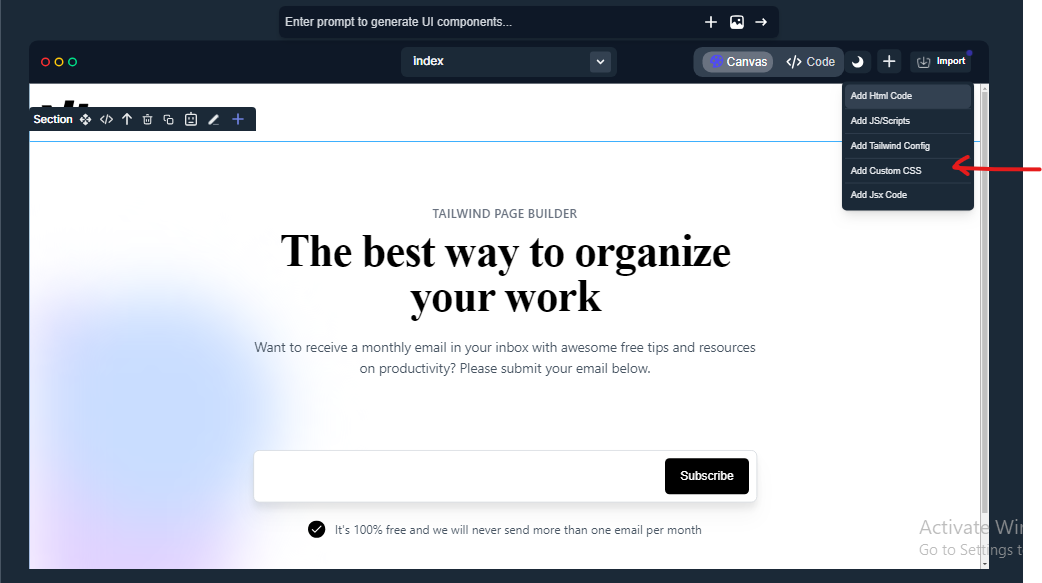
- Choose “Custom CSS” — From the import dropdown, select Custom CSS.
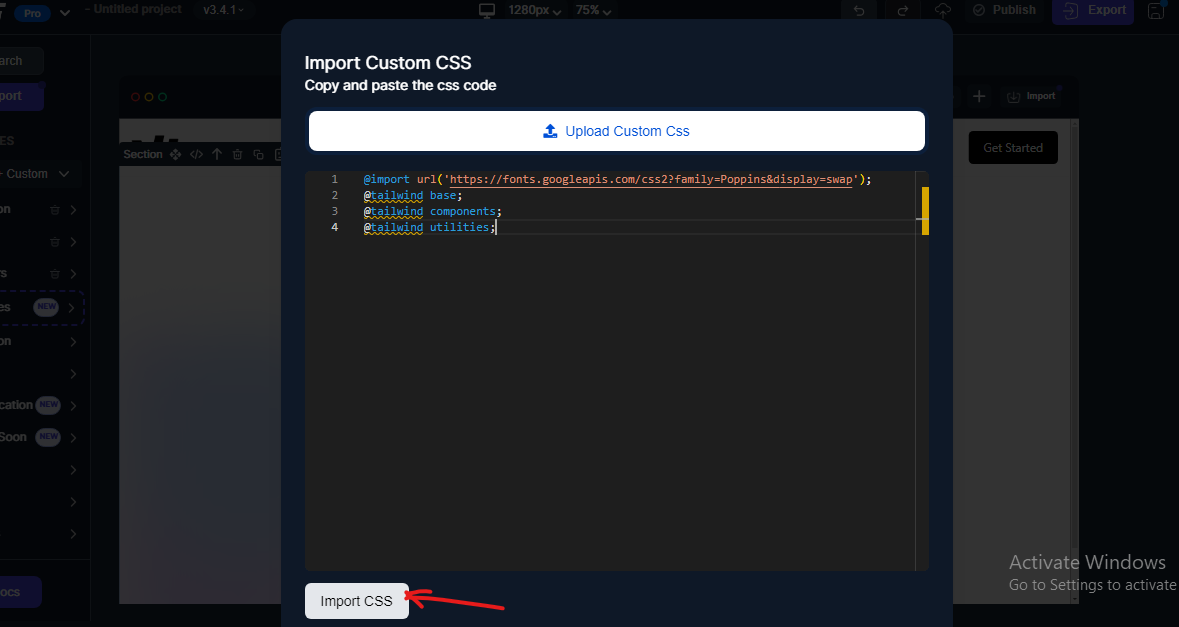
- Paste Your Custom CSS — Add your custom @import CSS code (e.g., Poppins font family).
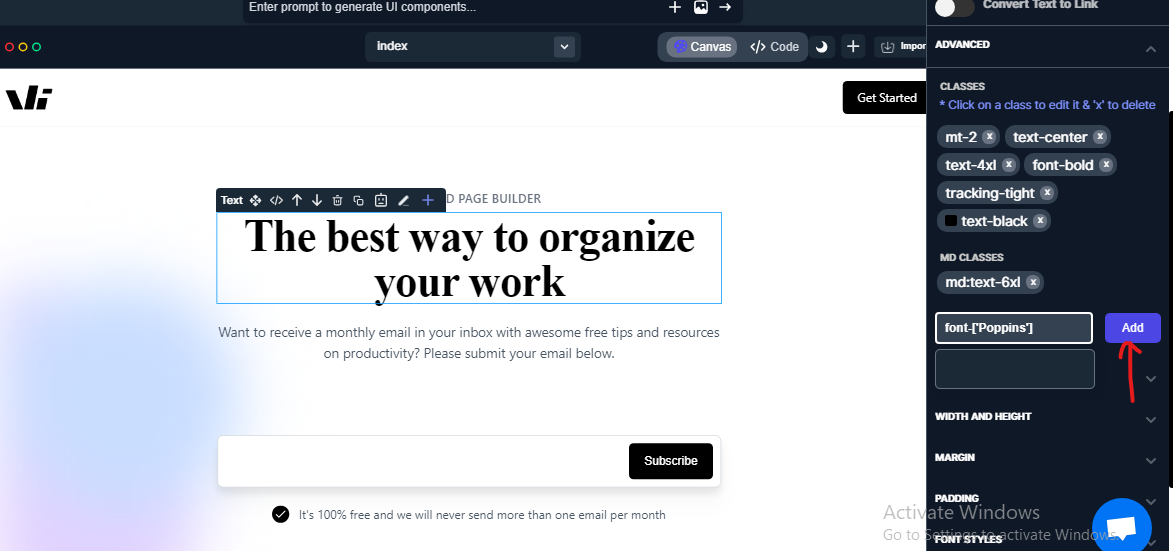
- Apply the Font Class — Select your text, then search for the CSS class you just imported in the search bar.
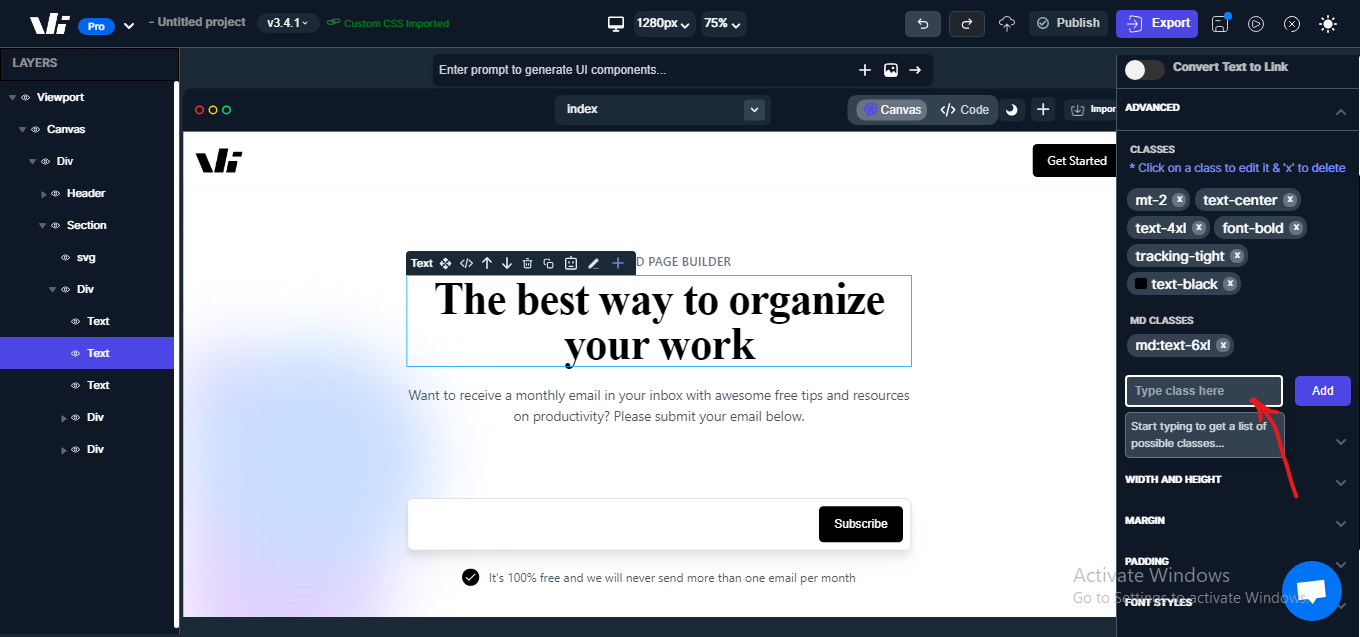
- Add the Font — Click the
Add buttonnext to the search result to apply your custom font to the text.
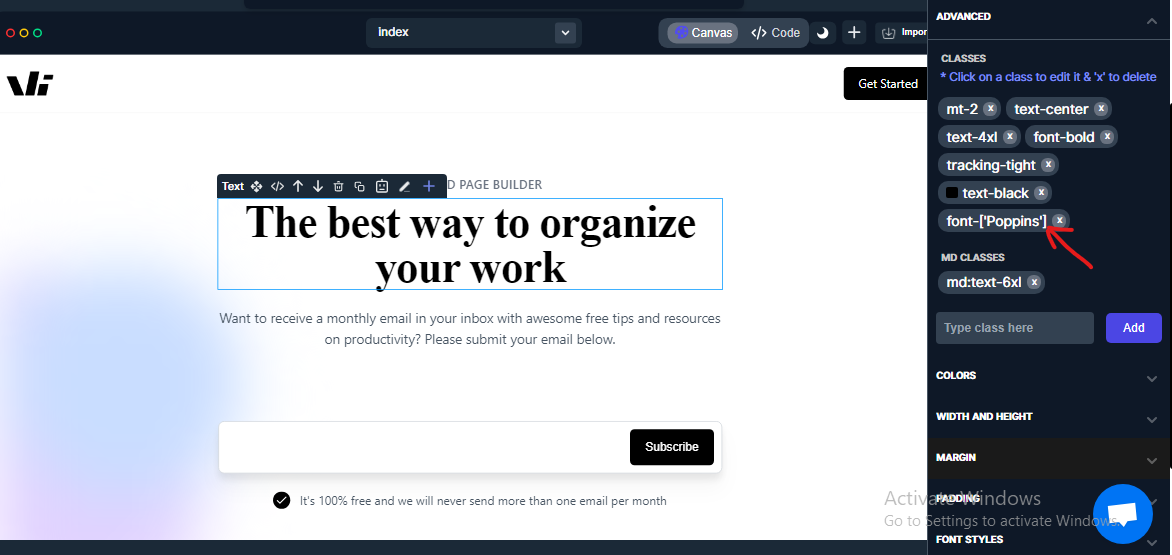
- Verify the Font — Your new font family will now appear in the project fonts list.
📌 Why It’s Useful
-
Gives you more control over typography, helping match brand guidelines or project style.
-
Makes it possible to use rare or unique fonts not included in Windframe’s defaults.
-
Improves visual consistency across different sections of your project.
💡 Tips
In Tailwind CSS, if your font name contains spaces, replace them with underscores when using it in class names. Wrap the font name in brackets to treat it as one string.
@import url('https://fonts.googleapis.com/css2?family=Delicious+Handrawn&display=swap');
<div class="font-['Delicious_Handrawn']"></div>
Test your custom fonts on different devices to ensure readability and consistent rendering.
Notes
-
Custom fonts must be imported via valid CSS for them to work in Windframe.
-
Large or unoptimized font files can impact performance; use only the weights and styles you need.